The Ultimate Survival Tools Guide: Essential Gear for Adventurers and Preppers
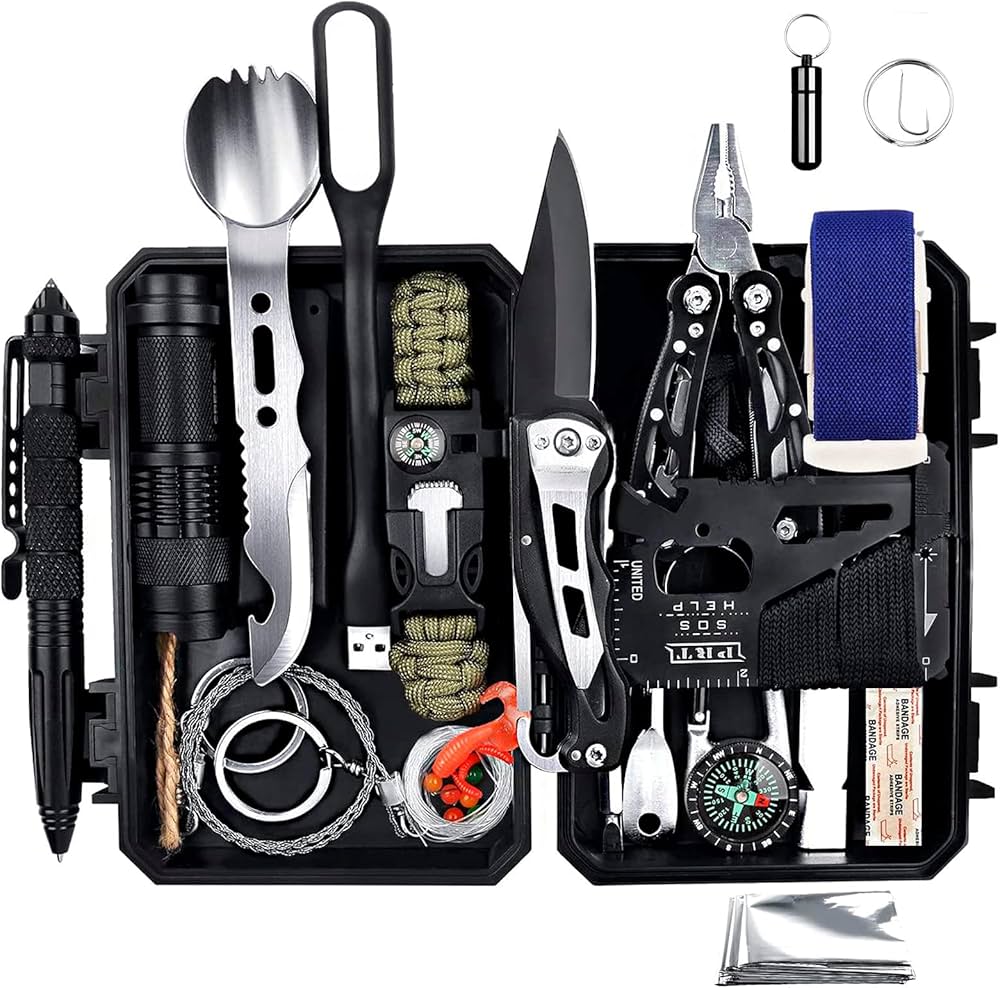
Table of Contents
- Introduction: The Art of Survival Preparedness
- 1. Understanding EDC and Survival Philosophy
- 2. Essential Survival Knives and Cutting Tools
- 3. Fire Starting Tools and Techniques
- 4. Water Purification and Hydration Systems
- 5. Shelter and Protection Equipment
- 6. Navigation Tools and Signaling Devices
- 7. First Aid and Medical Supplies
- 8. Multi-Tools and Everyday Carry Essentials
- 9. Food Procurement and Preparation Tools
- 10. Building Your Complete Survival Kit
- Conclusion: Preparedness Meets Adventure
- Frequently Asked Questions
Introduction: The Art of Survival Preparedness
There’s something primal and deeply satisfying about knowing you possess the skills and equipment to survive in challenging situations. Whether you’re a weekend hiker exploring wilderness trails, a serious prepper preparing for potential emergencies, an outdoor enthusiast pursuing multi-day expeditions, or simply someone who appreciates self-reliance and preparedness, understanding survival tools and techniques provides confidence, capability, and peace of mind that transcends any specific scenario.
The modern survival movement has exploded over the past decade, driven by increasing interest in outdoor recreation, growing awareness of potential emergency situations from natural disasters to infrastructure failures, popular media showcasing survival skills and bushcraft techniques, technological advances making quality survival gear more accessible and affordable, and a cultural shift toward self-reliance and practical skill development. This isn’t about doomsday paranoia or extreme survivalism—it’s about reasonable preparedness meeting practical capability, enabling you to handle unexpected situations confidently while enhancing your outdoor experiences and everyday security.
The global survival gear market exceeds $15 billion annually and continues growing rapidly. This expansion reflects genuine recognition that preparedness makes sense regardless of whether you ever face serious emergencies. The same tools and skills that could save your life if stranded in wilderness also enhance camping trips, provide security during natural disasters, offer practical utility in everyday life, and connect you to fundamental capabilities that modern convenience has made many people forget. Learning to start fires without matches, purify water from natural sources, navigate without GPS, or construct shelter from available materials provides not just survival capability but deep satisfaction from developing genuine competence.
But survival preparedness is about far more than simply accumulating gear. The most expensive equipment in the world won’t help if you don’t know how to use it effectively under stress. Conversely, knowledgeable individuals with minimal gear often fare better in survival situations than those laden with equipment they don’t understand. The relationship between tools, skills, and mindset forms the foundation of genuine preparedness—each element reinforcing the others in creating comprehensive capability.
Understanding this balance helps you avoid common pitfalls that trap many newcomers to survival preparedness. Some people accumulate vast collections of tactical gear and survival equipment without developing actual skills, creating false confidence that equipment alone provides security. Others focus exclusively on primitive skills while dismissing modern tools that could provide significant advantages. The wisdom lies in integrating both approaches—developing fundamental skills that work with minimal equipment while also understanding how quality tools amplify your capabilities and provide backup when challenges exceed what pure skills can address.
While the following demonstration highlights 15 essential survival items and tools, there’s still much more information you may not have discovered yet, which you’ll find in the exclusive details below this article. :
This comprehensive guide explores survival tools and equipment across all major categories necessary for wilderness survival and emergency preparedness. We examine essential cutting tools including knives, saws, and axes; fire starting equipment from primitive methods to modern igniters; water purification systems ensuring safe hydration; shelter construction tools and materials; navigation equipment from maps and compasses to modern GPS; first aid supplies and medical knowledge; multi-tools and EDC essentials for everyday carry; food procurement tools including fishing, trapping, and foraging equipment; and strategies for building complete, layered survival kits tailored to your specific needs and scenarios.
Each category receives detailed examination covering not just what equipment exists but how to choose quality tools, proper usage techniques, maintenance requirements, and how items integrate into comprehensive survival strategies. We emphasize practical application over theoretical knowledge—these aren’t museum pieces to admire but working tools you’ll actually use. Understanding comes from hands-on experience, so we encourage practicing with your equipment in controlled environments before facing real emergencies.
The scope extends beyond wilderness survival to encompass urban emergency preparedness, disaster readiness, vehicle emergency kits, and everyday carry considerations for normal life that could suddenly become abnormal. Natural disasters, vehicle breakdowns, power outages, medical emergencies, and countless other scenarios occur far more frequently than wilderness survival situations. The tools and mindset we discuss apply across this spectrum, providing genuine everyday value while also preparing you for less common but more serious challenges.
Survival preparedness appeals to diverse motivations and interests. Outdoor enthusiasts want capability and confidence during wilderness adventures. Preppers focus on disaster readiness and long-term sustainability. Minimalists appreciate learning to meet needs with fewer, better tools. Parents want to teach children valuable skills and self-reliance. Travelers seek security in unfamiliar environments. Military and first responders require reliable gear for demanding professional environments. Regardless of your specific motivation, understanding quality survival equipment and proper usage techniques serves you well.
The psychological benefits of preparedness deserve recognition alongside practical advantages. Anxiety about potential emergencies decreases when you know you possess tools and knowledge to handle challenges. Confidence increases as you develop genuine capabilities rather than hoping for rescue. Connection to fundamental skills grounds you in human heritage stretching back millennia—people have always needed fire, water, shelter, and food; learning to provide these connects you to ancestors and to nature itself. These psychological benefits enhance life quality even if you never face serious survival situations.
Environmental awareness naturally accompanies survival skills development. Learning to read landscapes, weather patterns, and natural resources makes you more observant and appreciative of natural environments. Understanding which plants are edible, which materials burn well, where to find water, and how to navigate by natural features transforms how you experience outdoors. This awareness enriches all outdoor activities while providing survival advantages when needed.
We’ll examine survival equipment through multiple lenses—effectiveness for intended purposes, quality and durability under demanding conditions, versatility across different scenarios, maintainability and repairability, weight and portability considerations, and cost-effectiveness relative to benefits provided. Not everyone needs or wants the same equipment—a day hiker’s needs differ from a long-distance backpacker’s, which differ from a vehicle-based overlander’s, which differ from a home emergency kit’s requirements. Understanding how to match equipment to specific needs and budgets enables building practical, useful kits rather than accumulating generic gear collections.
Safety and responsibility accompany survival knowledge. Many survival tools are inherently dangerous—knives, axes, fire—requiring respect and proper handling. Skills like fire starting need to be practiced responsibly, considering fire danger and environmental impact. Foraging requires absolute certainty in plant identification to avoid poisoning. Navigation demands understanding limitations and always having backup methods. We’ll address safety considerations throughout, helping you develop capabilities while minimizing risks to yourself and environment.
Legal considerations vary by location regarding certain survival tools and techniques. Knife laws differ dramatically between jurisdictions. Some areas restrict fire starting in certain seasons. Fishing and hunting regulations govern food procurement. Understanding applicable laws prevents legal problems while pursuing survival preparedness. Research regulations relevant to your locations and activities, adjusting equipment and practices accordingly.
Your survival preparedness journey is personal, evolving with your interests, needs, and capabilities. Start wherever you are—complete beginner or experienced outdoorsman—and build systematically. Master fundamental skills with basic tools before progressing to advanced techniques and specialized equipment. Practice regularly in safe conditions, developing muscle memory and confidence. Share knowledge with others, teaching skills while learning from different perspectives. Most importantly, actually use your gear—equipment that stays in closets doesn’t develop your skills or confidence.
The ultimate goal isn’t just surviving hypothetical disasters but thriving in daily life with enhanced capability, confidence, and connection to fundamental human skills. Whether you’re planning your first camping trip, building home emergency kits, developing everyday carry systems, or pursuing serious wilderness adventures, understanding quality survival tools and proper usage transforms you from passive consumer of modern convenience to capable individual prepared for whatever challenges life presents.
Let’s begin exploring the essential tools and knowledge that form the foundation of survival preparedness, starting with understanding the philosophy behind effective gear selection and moving through each major category of survival equipment. Your journey toward genuine preparedness and capability starts now.

1. Understanding EDC and Survival Philosophy
Before diving into specific equipment, understanding the philosophy behind effective survival preparedness and everyday carry systems prevents costly mistakes while building genuinely useful capabilities. This foundational knowledge guides all subsequent gear selections and skill development.
The Survival Triangle: Skills, Knowledge, and Equipment
Effective survival preparedness balances three interconnected elements—skills, knowledge, and equipment—each reinforcing the others in creating comprehensive capability.
Skills represent physical abilities developed through practice—starting fires, constructing shelters, navigating terrain, purifying water, administering first aid, using tools effectively. Skills require time and repetition to develop but provide capabilities that can’t be lost or broken. Even stripped of all equipment, skilled individuals possess advantages that pure equipment cannot provide. Skills also enable improvisation when proper tools aren’t available, extending capabilities beyond what specific gear provides.
Knowledge encompasses understanding—why things work, what options exist, how to adapt techniques to different situations, when to use specific approaches, what dangers to avoid. Knowledge informs skill development and equipment selection while providing flexibility responding to unexpected situations. Understanding fire science helps you start fires with various materials and methods rather than depending on a single technique. Knowing which plants are edible expands food options beyond what you carry. Comprehending weather patterns aids decision-making and planning.
Equipment provides tools that amplify skills and knowledge—quality knives cut more effectively than improvised sharp stones, modern fire starters work in conditions where primitive methods fail, water filters purify more water faster than boiling, GPS devices navigate more precisely than map and compass. Equipment extends capabilities, provides backup when primary methods fail, and accomplishes tasks impossible or impractical with skills alone. But equipment requires maintenance, can break or be lost, and only benefits those who know how to use it properly.
The ideal approach develops all three elements in concert. Learn skills first using basic equipment, understanding fundamental techniques before relying on advanced gear. Acquire knowledge through study, practice, and experience rather than just accumulating equipment. Choose equipment that matches your skill level and needs rather than simply buying the most expensive or tactical-looking gear. This balanced development creates genuine capability rather than false confidence from gear collections or untested theoretical knowledge.
Everyday Carry Philosophy
EDC (Everyday Carry) represents a subset of survival thinking focused on tools you actually carry daily—items practical for normal life that also provide capability in unexpected situations. The EDC community has grown exponentially, sharing ideas about practical, useful items worth carrying consistently.
The foundation of effective EDC is items you’ll actually carry daily. Equipment left at home or in vehicles because it’s too bulky, heavy, or impractical doesn’t help when needed. EDC prioritizes compact, lightweight, versatile tools fitting comfortably into pockets or small pouches without creating burden discouraging consistent carrying. Quality matters enormously in EDC since items endure daily handling and potential heavy use—poorly made tools fail quickly under constant carrying and use.
Layered preparedness provides different capability levels for different scenarios. Your person carries minimal essential items—a good knife, reliable flashlight, fire starter, perhaps a small first aid kit. Your vehicle contains more extensive equipment—comprehensive first aid kit, extra food and water, additional tools, blankets. Your home includes even more extensive supplies—weeks of food and water, comprehensive tool collections, extensive medical supplies. This layering ensures you always have basic capability while providing increasing resources as you access additional layers.
The Rule of Threes
Survival priorities follow the Rule of Threes, which helps organize thinking about what matters most:
Research indicates that it is possible to survive for three minutes without air - breathing is the absolute priority, although situations that threaten breathing are relatively rare except in certain accidents or environments.
Research suggests that it is possible to survive for three hours without shelter in harsh environments, where both hypothermia and hyperthermia can lead to rapid death, making temperature regulation crucial in extreme conditions.
Survival priorities follow the Rule of Three, which helps organize thinking about what is most important:
Research suggests that it is possible to survive for three minutes without air. Breathing is the top priority, although situations that threaten breathing are relatively rare except in accidents or specific environments.
Research suggests that it is possible to survive for three hours without shelter in harsh environments, where both hypothermia and hyperthermia can lead to rapid death, making temperature regulation crucial in extreme conditions. Shelter includes clothing, fire, and physical structures that protect from the elements.
Research suggests that it is possible to survive for three days without water. Dehydration severely affects physical and mental performance before it becomes life-threatening. Water takes precedence over food in most survival situations.
Research suggests that it is possible to survive for three weeks without food. Although hunger is uncomfortable, it is currently less dangerous than exposure to the elements or dehydration. Food becomes a priority once the most urgent needs are met.
This rule guides prioritization of both equipment and actions in survival situations. Address immediate threats before less urgent needs. Carry tools addressing likely priorities in your environment—temperature regulation equipment for cold climates, water purification for hot or wet environments, etc.
Quality vs. Quantity in Gear Selection
Survival equipment spans enormous quality ranges, from cheap imports to professional-grade tools costing ten times more. Understanding value helps you invest wisely.
Quality matters most for critical items you depend on absolutely—your primary knife, main fire starter, water filter, first aid supplies. These items deserve investment in proven, reliable equipment from reputable manufacturers. Failure of critical gear in serious situations could mean the difference between difficulty and disaster. Research thoroughly, read reviews from long-term users, and buy once rather than repeatedly replacing cheap failures.
Acceptable quality works for redundant items or equipment addressing less critical needs. Your backup knife can be budget-friendly since your primary knife is quality and you’re unlikely to need both. Supplementary fire starters can be inexpensive since you’re carrying multiple methods. This approach allocates budget wisely, investing heavily in essential items while economizing on less critical equipment.
Beware of false economy where cheap equipment fails quickly, requiring replacement and ultimately costing more than quality would have. Calculate total cost of ownership over equipment’s expected lifespan rather than just initial purchase price. Quality tools often last decades while cheap alternatives fail within months or years.
Testing and Training
Equipment without training provides false security. Regular practice with your gear develops crucial muscle memory and confidence. Practice fire starting in various conditions—wet weather, wind, cold—discovering what works and what doesn’t before depending on those skills in emergencies. Use your knife for camp tasks, developing proper techniques and understanding its capabilities and limitations. Practice water purification, shelter construction, navigation, and first aid regularly.
Scenario-based training helps identify gaps in equipment or skills. Plan hypothetical situations—lost on day hike, vehicle breakdown in remote area, natural disaster requiring evacuation—and mentally walk through responses. What equipment would you need? What skills would you use? What problems might you encounter? This mental practice reveals deficiencies to address before facing real emergencies.
Physical practice outdoors provides invaluable experience. Camp using only what’s in your survival kit, discovering what you really need versus what’s dead weight. Hike with your EDC items, learning if they’re comfortable to carry daily or if adjustments are needed. This hands-on experience teaches more than any amount of reading or video watching.
Understanding survival philosophy prevents common mistakes while building genuinely useful capabilities. Balance skills, knowledge, and equipment rather than relying on any single element. Choose quality tools for critical needs while economizing sensibly on less essential items. Practice regularly with your gear, developing real proficiency rather than just accumulating equipment. Layer your preparedness from everyday carry through vehicle kits to home supplies. Follow the Rule of Threes prioritizing immediate needs appropriately. This foundation guides all subsequent equipment selection and skill development.
2. Essential Survival Knives and Cutting Tools
Knives represent humanity’s oldest tools and remain among the most versatile and essential items for survival and outdoor activities. Understanding knife selection, proper use, and maintenance enables you to choose appropriate cutting tools while developing skills to use them safely and effectively.
Survival Knife Selection Criteria
Choosing quality survival knives requires understanding what characteristics matter for demanding use in challenging conditions.
Blade steel significantly affects performance, durability, and maintenance requirements. Carbon steel (1095, O1, etc.) sharpens easily, holds decent edges, and strikes sparks for fire starting but rusts without proper care. Stainless steel (440C, AUS-8, etc.) resists corrosion better but sharpens more slowly and typically won’t strike sparks. Modern tool steels (D2, CPM-154, etc.) offer excellent edge retention and reasonable corrosion resistance at higher costs. For survival knives, most experts prefer carbon steel or quality stainless rather than exotic super steels—the former’s ease of sharpening and maintenance outweighs edge retention advantages in survival contexts where field sharpening may be necessary.
Blade design influences capabilities and limitations. Fixed blade knives provide superior strength and reliability compared to folding knives—there are no mechanical components to fail, and full tang construction (blade steel extending through handle) creates tools capable of withstanding batoning, prying, and other demanding tasks. Blade length between 4-6 inches offers good balance between utility and portability—shorter blades limit capability for larger tasks while longer blades become unwieldy for detailed work and add unnecessary weight.
Tang construction determines strength and durability. Full tang (blade extending to handle end) provides maximum strength for demanding use. Partial tang (blade extending partway into handle) reduces weight and cost but creates potential break points under stress. Stick tang (thin extension of blade into handle) works for lightweight or budget knives but should be avoided for serious survival applications where knives might see hard use.
Blade grind affects cutting performance and ease of sharpening. Flat grinds provide strong, easily sharpened edges suitable for general use. Convex grinds (also called Scandi grinds) excel at wood processing and bushcraft tasks. Hollow grinds create very sharp edges for slicing but sacrifice some strength. For survival knives, flat or convex grinds generally serve better than hollow grinds.
Handle material must provide secure grip even when wet, cold, or bloody. Micarta, G10, and quality textured rubber provide excellent grip in all conditions. Avoid smooth materials like polished wood or slippery synthetics that become dangerous when wet. Handle shape should fit your hand comfortably without hot spots during extended use. Guard or choil prevents hands from sliding onto blade during hard use.
Types of Survival Knives
Different knife categories serve different primary purposes in survival and outdoor contexts.
Fixed blade survival knives represent the most reliable choice for serious outdoor use and survival situations. These knives have no moving parts to break, provide maximum strength through full tang construction, and handle demanding tasks from shelter construction to food preparation. Popular models include Morakniv Companion (affordable, excellent performance), Ka-Bar USMC (military proven durability), ESEE-4 or ESEE-5 (modern survival designs), and Fallkniven F1 (premium Scandinavian quality). Choose based on intended use, budget, and personal preferences after handling various options.
Folding knives provide convenient everyday carry through compact size that fits comfortably in pockets. Quality folding knives with locking mechanisms serve well for routine cutting tasks and light outdoor use. However, they’re less suitable for serious survival situations due to mechanical complexity, reduced strength compared to fixed blades, and difficulty cleaning in field conditions. Respected folding knife brands include Benchmade, Spyderco, and Buck among many quality manufacturers.
Bushcraft knives specialize in wood processing tasks central to wilderness living—carving, batoning, shelter construction, trap making. These knives typically feature Scandi grinds, 3.5-5 inch blades, and designs optimized for wood work rather than combat or tactical applications. The Morakniv Bushcraft series and Helle knives exemplify this category. Bushcraft knives excel for wilderness camping and extended outdoor living but may lack features useful for general survival.
Multi-purpose utility knives balance various tasks reasonably well without excelling at any particular application. Many commercial “survival knives” fall into this category, featuring 5-7 inch blades, saw backs, full tangs, and general-purpose designs. While lacking the specialized optimization of bushcraft or tactical knives, quality utility survival knives handle most tasks adequately and serve well as single-knife solutions for varied applications.
Supplementary Cutting Tools
While a quality knife handles most cutting needs, supplementary tools expand capabilities significantly.
Folding saws cut wood far faster and easier than knives, particularly for branches too thick for easy knife work. Compact folding saws like Silky or Bahco models pack small but cut remarkably well. These prove invaluable for shelter construction, firewood processing, and various camp tasks. A small folding saw weighing just ounces dramatically increases your wood processing capability compared to knife alone.
Hatchets or small axes process wood more efficiently than knives for larger branches and logs. Lightweight backpacking axes (1-2 pounds) provide excellent capability without excessive weight. Quality options include Gransfors Bruks Small Forest Axe, Husqvarna Hatchet, or Fiskars X7. Axes require proper technique to use safely and effectively—invest time learning correct form before relying on axes in field.
Machetes excel in tropical or heavily vegetated environments, clearing trails and processing vegetation far faster than knives. The distinctive long blade (12-18 inches) provides reach and cutting power for thick vegetation. However, machetes add significant weight and bulk, making them practical mainly for specific environments or scenarios where vegetation clearing is primary need.
Multi-tools combine various implements in compact packages, providing scissors, pliers, screwdrivers, and other tools alongside knife blades. While multi-tool knives are typically inferior to dedicated knives, the additional tools often prove invaluable. Leatherman and Victorinox (Swiss Army) offer quality multi-tools serving well for everyday carry and supplementary camping tools.
Knife Skills and Techniques
Quality knives require proper technique to use safely and effectively.
Basic knife grip involves secure hold with four fingers wrapped around handle and thumb on spine or handle side for control. Avoid death grip—moderate pressure provides control without causing hand fatigue. Always cut away from your body and away from anything you don’t want to cut. Maintain awareness of blade position at all times.
Batoning uses your knife to split wood by placing blade on wood and striking the spine with a baton (another piece of wood), driving the blade through. This technique processes firewood and creates kindling efficiently but requires full tang knives with thick spines—attempting to baton with inappropriate knives will break them. Never baton with folding knives, partial tang knives, or thin-bladed knives.
Feather sticks create excellent fire starting tinder by carving thin curls of wood that catch sparks and flames easily. This bushcraft technique uses knife to repeatedly shave thin strips along a stick without detaching them, creating fluffy, easily ignitable material. Mastering feather sticks provides reliable fire starting ability with just knife and dry wood.
Food preparation requires clean knives and proper technique to avoid contamination and injury. Always cut on stable surfaces, use appropriate pressure, and maintain control throughout cuts. Keep food prep knives separate from knives used for other tasks when possible, or thoroughly clean knives between uses.
Knife Maintenance and Care
Proper maintenance keeps knives performing reliably for decades.
Sharpening maintains cutting ability essential for all knife tasks. Learn to sharpen with whetstones (water stones or oil stones)—this traditional method works anywhere with stones and water or oil, requires no electricity or batteries, and produces excellent edges when done properly. Practice on inexpensive knives before sharpening valuable survival knives. Maintain consistent angles (typically 15-25 degrees per side) throughout sharpening strokes. Progress from coarse stones for damaged edges through fine stones for polishing. Test sharpness by carefully slicing paper or shaving arm hair—truly sharp knives accomplish both easily.
Cleaning prevents rust and maintains hygiene. Wipe blades clean and dry after use, particularly carbon steel which rusts easily. Avoid leaving knives wet or dirty. When processing food, wash thoroughly with soap and water, drying immediately. For carbon steel knives used in corrosive environments (salt water, acidic materials), extra cleaning and oiling prevents rust.
Oiling protects carbon steel from rust. Apply light coat of mineral oil, gun oil, or specialized knife oil to blade and tang after cleaning. Wipe excess—you want thin protective film, not thick coating attracting dirt. Reapply after exposure to moisture or between storage periods.
Storage in dry locations protects knives from environmental damage. Sheaths should allow some air circulation rather than trapping moisture against blades. Leather sheaths look traditional but can retain moisture—consider kydex or plastic sheaths for storage. Check stored knives periodically for rust or damage, addressing problems immediately.
Shop on AliExpress via link: wholesale-survival-knife
Understanding knives—from selection through technique to maintenance—provides foundation for countless survival and outdoor tasks. Quality knives represent investments lasting decades or lifetimes when properly cared for. Develop skills with your knives through regular practice, building confidence and capability that serves you across all outdoor activities and potential survival situations.

3. Fire Starting Tools and Techniques
Fire provides warmth, light, water purification, food cooking, psychological comfort, and signaling capability—making fire starting among the most critical survival skills. Understanding multiple fire starting methods and carrying appropriate equipment ensures you can create fire in various conditions.
The Fire Triangle: Heat, Fuel, and Oxygen
Successful fires require three elements simultaneously: heat sufficient to ignite materials, fuel providing combustible material, and oxygen enabling combustion. Understanding this triangle helps troubleshoot fire starting difficulties and select appropriate methods for conditions.
Heat sources vary from open flames (lighters, matches) to sparks (ferrocerium rods, flint and steel) to friction (bow drills, hand drills). Different heat sources require different tinder preparation—open flames ignite easily combustible materials directly while spark-based methods need extremely fine, dry tinder catching sparks and nurturing them into flames.
Fuel progression moves from tinder (easily ignitable materials) through kindling (small twigs and sticks) to larger fuel wood maintaining fires. Rushing this progression by adding large wood too early smothers fires before they establish adequately. Patience and proper fuel sizing determines success or failure more than heat source quality.
Oxygen requires proper fire structure allowing air circulation. Teepee structures funnel heat upward while allowing air access. Log cabin structures create larger, longer-burning fires. Understanding how air flows through fire structures improves success rates dramatically.
Modern Fire Starting Tools
Contemporary fire starting equipment provides reliable ignition in challenging conditions.
Butane lighters offer the simplest, most reliable fire starting for most conditions. Cheap Bic lighters work remarkably well, cost under $2, and provide hundreds of lights. Refillable lighters from Zippo or similar manufacturers work well but require fuel that can evaporate during storage. Carry multiple lighters—they’re small, light, and inexpensive. Protect from moisture with waterproof cases or plastic bags.
Waterproof matches provide backup to lighters, working when wet after drying. Strike-anywhere matches offer convenience but are increasingly difficult to find. Safety matches require striking surfaces but store more safely. UCO Stormproof matches burn in wind and rain, providing superior reliability in harsh conditions. Match safes or waterproof cases protect matches from moisture.
Ferrocerium rods (fire steels) generate hot sparks through friction, working when wet, at altitude, and in extreme cold where lighters fail. Quality ferro rods last thousands of strikes, providing extremely long-term reliability. They require practice and good tinder but offer excellent backup to modern methods. Popular options include Light My Fire FireSteel, Exotac nanoSTRIKER, and countless budget alternatives. Larger rods generate bigger sparks and easier striking—prioritize rod size over compactness for primary fire kits.
Magnesium fire starters combine magnesium bars (shaved into tinder creating extremely hot burning material) with ferrocerium strips (producing sparks to ignite magnesium). These work in very wet conditions since magnesium burns hot enough to dry and ignite even damp tinder. However, they require significant effort shaving adequate magnesium—making them better as backup rather than primary method.
Fresnel lenses focus sunlight to ignition temperatures, providing fire starting without consumables or moving parts. Credit-card-sized Fresnel lenses pack flat and weigh almost nothing. They require sunny conditions and dry tinder but work indefinitely without wearing out. Magnifying glasses and reading glasses also work as solar fire starters.
Primitive Fire Starting Methods
Traditional fire starting methods provide capability when modern tools are unavailable or as satisfying skill development.
Bow drill friction uses a bow (bent stick with cordage) rotating a spindle against a fire board, generating friction heat that creates coal. This coal is transferred to tinder bundle and blown into flame. Bow drill is perhaps the most reliable primitive fire method, working in various climates and requiring only wood and cordage. However, it demands significant practice, proper wood selection, and good technique. Mastering bow drill provides deep satisfaction and genuine backup capability.
Hand drill uses hands to spin spindle against fire board, similar to bow drill but without bow. This method is more difficult, requiring greater speed and endurance while being harder on hands. However, hand drill requires even fewer materials than bow drill—just wood—making it the ultimate minimalist method. Success requires ideal conditions, proper wood, and excellent technique.
Flint and steel strikes high-carbon steel against flint (or similar hard rock), producing sparks that ignite char cloth (charred fabric that catches sparks easily). This traditional method predates matches and lighters, remaining popular in historical reenactment and bushcraft. While romantic and traditional, it’s less practical than modern methods, requiring char cloth preparation, good technique, and patience.
Fire plow uses hardwood stick abraded vigorously along softwood groove, creating friction heat and dust that eventually ignites. This simple-sounding method is actually quite difficult, requiring significant effort and ideal wood combinations. Fire plow works as desperation method or skill challenge but is impractical compared to alternatives.
Tinder Selection and Preparation
Regardless of ignition source, proper tinder makes the difference between success and failure.
Natural tinders vary by environment but include dry grass, birch bark, cattail fluff, thistledown, pine needles, dry leaves, and countless other materials. The key is dryness—wet tinder won’t ignite regardless of heat source. Look for materials in protected areas under overhangs, inside standing dead trees, or elevated off damp ground. Process materials by shredding, teasing apart fibers, and creating fluffy, airy masses that catch sparks or flames easily.
Prepared tinders offer superior performance through materials specifically processed for easy ignition. Cotton balls with petroleum jelly create excellent tinder burning hot and long—prepare these at home, storing in waterproof containers. Dryer lint collects naturally and ignites easily—save it in waterproof bags. Commercial tinder options include WetFire cubes, Esbit tablets, and various fire starter products. While not strictly necessary, prepared tinders provide insurance when natural materials are wet or scarce.
Feather sticks carved from dry wood create excellent fire starting material in forests where dry fine tinder is scarce. This bushcraft technique uses knife to shave thin curls along stick without removing them, creating fluffy material catching sparks and flame easily. Feather stick creation doubles as knife skill practice.
Fatwood (resin-rich pine wood from old stumps or dead trees) burns exceptionally well even when damp, providing nearly guaranteed ignition when available. The high resin content makes fatwood self-starting—just shave small pieces with knife and apply flame. Collecting fatwood when found and carrying some in fire kit provides excellent insurance.
Fire Starting in Adverse Conditions
Challenging conditions test fire starting skills and equipment, requiring adapted techniques.
Wet conditions demand protecting tinder and kindling from moisture. Look for dry materials in protected locations—inside standing dead trees, under overhangs, beneath dense evergreen branches. Process outer wet layers to reach dry interior wood. Use larger fires to dry subsequent fuel before adding it. Carry prepared waterproof tinder that works despite wet conditions. Build fire platforms from green wood or rocks elevating fire above wet ground.
Wind disrupts fire starting by blowing flames away, cooling fires prematurely, and scattering tinder. Create windbreaks using rocks, logs, or natural features. Build fires in depressions or beside obstructions providing wind protection. Use wind to your advantage once fires establish—positioning fires so wind feeds oxygen into flames rather than blowing them out.
Cold affects lighters, causing butane to liquefy and fail below freezing. Keep lighters warm in inner pockets close to body heat. Ferrocerium rods work in any cold, providing critical backup. Cold also makes handling small materials difficult with numb fingers—wear gloves that allow dexterity or warm hands periodically. Cold environments often provide dry fuel, partially offsetting ignition difficulties.
Altitude affects lighter performance through reduced oxygen levels. Above 10,000 feet, some lighters struggle. Ferrocerium rods work at any altitude, providing essential backup for high-elevation activities. Plan extra time for fire starting at altitude, allowing for reduced combustion efficiency.
Fire Management and Safety
Successfully starting fires is just the beginning—proper management and safety prevent accidents.
Fire control requires containing flames in defined areas using rock rings, dirt clearing, or designated fire pits. Clear flammable materials from around fire sites—at least 10-foot radius in high fire danger conditions. Never leave fires unattended. Keep water and digging tools nearby for emergency fire suppression.
Extinguishing fires completely before leaving prevents wildfires. Drown fires with water, stir ashes to expose hidden embers, add more water, repeat until ashes are completely cold to touch. “Dead out” means you can safely place your bare hand in the ashes without feeling any heat. This thoroughness prevents seemingly extinguished fires from reigniting hours later.
Fire regulations vary by location and season. Respect fire bans in high danger conditions—your convenience doesn’t justify wildfire risk. Use established fire rings in designated camping areas. Some locations prohibit ground fires entirely, requiring camp stoves for cooking. Research regulations for your locations, planning accordingly.
Leave No Trace principles minimize fire impacts. Use existing fire rings rather than creating new ones. Keep fires small—large bonfires aren’t necessary for warmth or cooking. Use dead and downed wood only, never cutting living trees. Scatter cold ashes widely if regulations allow, or pack them out. Restore fire sites to natural appearance when possible.
Shop on AliExpress via link: wholesale-fire-starter
Mastering fire starting—from multiple ignition methods through tinder selection to fire management—provides critical survival capability and deep satisfaction. Regular practice builds skills and confidence, ensuring you can create fire when it matters most. Carry redundant ignition sources in layered systems, combining modern convenience with primitive backup methods. Respect fire’s power through proper safety practices and environmental responsibility.
4. Water Purification and Hydration Systems
Water sustains life—the human body can survive weeks without food but only days without water. Understanding water sourcing, purification, and storage ensures safe hydration in survival situations and outdoor adventures, preventing potentially fatal dehydration or waterborne illnesses.
Water Requirements and Dehydration
The average person needs approximately 2-3 liters of water daily under normal conditions, with requirements increasing significantly during physical exertion, hot weather, high altitude, or illness. Dehydration degrades physical performance, cognitive function, and decision-making ability long before becoming life-threatening—even mild dehydration of just 2% body weight reduction impairs performance noticeably.
Recognizing dehydration signs allows early intervention before serious problems develop. Thirst is the first indicator, though it’s not entirely reliable—you can be mildly dehydrated before feeling thirsty, and extreme dehydration can suppress thirst sensation. Dark urine indicates inadequate hydration; pale yellow or clear urine suggests proper hydration. Reduced urination frequency signals dehydration—healthy adults should urinate every few hours. Headaches, dizziness, fatigue, and confusion all indicate progressing dehydration requiring immediate water intake.
Water Source Selection
Running water from streams and rivers generally is safer than stagnant water, though still requires purification. Moving water tends to have less contamination buildup and more oxygen, limiting some microbial growth. However, animal waste, human contamination, and natural bacteria still pose risks requiring treatment.
Springs and seeps often provide cleaner water than surface sources since underground filtration removes some contaminants. However, springs aren’t automatically safe—they still can contain harmful organisms and require purification. Springs in areas with minimal human and animal activity pose lower contamination risks than those near livestock, settlements, or high-traffic areas.
Lakes and ponds present moderate contamination risks—worse than streams but often cleaner than puddles or ditches. Take water from deeper areas away from shores where contamination concentrates. Look for clear water without obvious algae blooms or debris.
Rainwater collection provides relatively clean water, though it still requires purification due to bird droppings, airborne contaminants, and contaminated collection surfaces. Rainwater is excellent for washing when purification isn’t possible, reserving purified water for drinking.
Snow and ice must be melted before consumption—eating frozen water causes dangerous core temperature drops and actually dehydrates you as your body burns energy melting it internally. Melt snow near fires or using body heat in plastic bottles inside clothing. Prefer ice over snow when available—ice yields more water per volume and contains less air.
Water Purification Methods
Multiple purification methods exist, each with advantages, limitations, and appropriate applications.
Boiling kills all biological contaminants through sustained heat, making it the most reliable purification method for biological threats. Bring water to rolling boil for 1 minute at sea level (3 minutes above 6,500 feet) to kill bacteria, viruses, protozoans, and parasites. Boiling requires fire or stove, fuel, time, and container—making it impractical for immediate needs or when traveling. Boiled water tastes flat due to oxygen loss; aerating by pouring between containers improves taste.
Chemical purification using iodine or chlorine tablets kills most organisms through chemical reactions. These tablets are lightweight, inexpensive, require no energy, and work relatively quickly (30 minutes to 4 hours depending on temperature and organism). However, they don’t remove sediment or chemical contaminants, taste unpleasant, and iodine shouldn’t be used long-term (more than a few weeks) or by pregnant women. Popular options include Potable Aqua, Aquatabs, and chlorine dioxide tablets.
Filtration systems pump or gravity-feed water through filter media physically removing bacteria, protozoa, sediment, and improving taste. Quality filters like Sawyer, Katadyn, and LifeStraw remove 99.99999% of bacteria and 99.9999% of protozoa. However, basic filters don’t remove viruses (typically not a threat in North American wilderness but important in developing countries) or chemical contaminants. Filters eventually clog, requiring cleaning or replacement. They can freeze and break in cold conditions if water in them freezes.
UV purification uses ultraviolet light disrupting microorganisms’ DNA, rendering them unable to reproduce and cause infection. Devices like SteriPEN work quickly (90 seconds per liter), kill viruses unlike basic filters, and require no chemical taste. However, they require batteries or charging, water must be clear (suspended sediment blocks UV rays), and devices can break. UV works excellently as primary method with backup alternatives, or as supplement to filtration.
Combined systems use multiple purification stages for comprehensive protection. For example, Grayl systems combine filtration with electroadhesion and active carbon, removing bacteria, protozoa, viruses, heavy metals, and chemicals while improving taste. These systems cost more and have shorter lifespans than basic filters but provide superior protection, particularly in questionable water sources or developing countries.
Hydration Systems and Containers
Carrying and storing water properly ensures you have accessible hydration when needed.
Water bottles provide simple, reliable hydration storage. Stainless steel bottles offer durability and allow boiling water directly in bottle (remove plastic caps first). Plastic bottles (Nalgene-style) are lightweight and inexpensive but can’t tolerate boiling and eventually degrade. Collapsible bottles save space when empty, useful for varying load requirements. Choose bottles with wide mouths for easy filling, cleaning, and adding ice or treatment tablets.
Hydration bladders (like CamelBak) integrate into backpacks, providing convenient drinking through tubes without stopping. The convenience encourages more frequent drinking, improving hydration. However, bladders are harder to monitor (you can’t easily see remaining water), difficult to clean thoroughly, can leak damaging gear, and don’t work well in freezing conditions where tubes and bite valves freeze. Use bladders for day hikes in moderate weather, reserving bottles for extended trips or harsh conditions.
Canteens and military-style systems offer durability and compatibility with cooking systems. Metal canteens can boil water directly, serving as both storage and cooking vessels. Many military canteen systems include cups and stoves designed to work together, providing integrated hydration and cooking solutions.
Water storage containers for base camps include large capacity options—collapsible jugs, dromedary bags, rigid containers. These store large quantities efficiently for camps or vehicles, providing reserve capacity beyond what you carry while hiking. Look for containers designed for potable water rather than improvising with non-food-grade plastics.
Water Conservation Strategies
Conserving water extends limited supplies, critical in situations where water sources are scarce or purification capacity is limited.
Minimize water loss through reduced perspiration by resting during hot parts of day, wearing appropriate clothing that breathes and provides sun protection, and avoiding unnecessary exertion when possible. Work during cooler morning and evening hours. Use shade effectively.
Reduce water use in food preparation by choosing foods requiring minimal cooking, using cooking water for drinking when safe, and cleaning dishes with minimal water. Avoid salty foods increasing thirst. Dried and dehydrated foods require significant water for preparation—consider ready-to-eat options when water is scarce.
Breathing through nose rather than mouth reduces moisture loss through respiration. Avoid alcohol and caffeine, which have diuretic effects increasing water loss. Stay calm—anxiety increases breathing rate and perspiration, both wasting water.
Indicator species suggest water sources even when water isn’t visible. Lush vegetation, animal trails converging, insects, and bird flight patterns early morning and evening often lead toward water. Topography helps—water flows downhill and collects in valleys. Follow drainage paths downslope.
Shop on AliExpress via link: wholesale-water-filter
Understanding water sourcing, purification, and management ensures safe hydration across all outdoor activities and survival situations. Carry multiple purification methods—combine filter with chemical treatment for redundancy. Practice purification techniques before emergencies, becoming familiar with equipment operation. Plan water needs realistically, carrying capacity appropriate for trip lengths and source availability. Proper hydration maintains physical and cognitive function, making water management skills among the most crucial survival capabilities.

5. Shelter and Protection Equipment
Shelter protects against environmental threats—exposure to extreme temperatures, wind, rain, snow, and sun—making it a critical survival priority often ranking second only to breathing. Understanding shelter construction and carrying appropriate equipment enables you to create effective protection in various environments and conditions.
The Shelter Priority
The rule of three states that the probability of surviving for three hours without shelter in harsh conditions - hypothermia caused by exposure to cold or hyperthermia caused by heat can kill quickly. Even in moderate conditions, shelter dramatically improves comfort, morale, and sleep quality, all crucial for maintaining physical and mental performance during survival situations or extended outdoor trips.
Clothing represents your first layer of shelter, providing immediate temperature regulation. The layering system includes base layers wicking moisture away from skin, insulation layers trapping warm air, and outer shell layers blocking wind and precipitation. Understanding proper clothing selection and layering prevents many exposure problems before they develop, reducing reliance on emergency shelters.
Emergency Shelter Materials
Carrying lightweight emergency shelter materials provides insurance when planned shelter fails or situations change unexpectedly.
Emergency space blankets (mylar survival blankets) reflect body heat, providing surprising warmth for minimal weight and bulk. These thin metallic sheets cost under $5, weigh 2-3 ounces, and pack incredibly small. While not durable enough for extended use, they provide crucial protection in emergencies. Use them as ground insulation, emergency sleeping bag liners, emergency bivvy bags, signal panels (reflective surface), or rain protection. Carry multiple—they’re so cheap and light that redundancy makes sense.
Emergency bivvy bags (bivy sacks) provide waterproof, windproof cocoons enclosing entire body and sleeping bag if you have one. Quality bivvies from companies like SOL (Survive Outdoors Longer) or Adventure Medical Kits include space blanket material bonded to tougher outer layers, providing durability alongside heat retention. These weigh 3-8 ounces and compress to fist size, making them excellent emergency shelter that fits any pack. Practice using bivvy bags before emergencies—condensation management and proper entry/exit techniques require familiarity.
Tarps provide versatile shelter through multiple configuration options—A-frame, lean-to, flying tent, and countless other setups adapt to terrain, weather, and available anchor points. Quality backpacking tarps balance weight, durability, and size—8x10 feet provides adequate coverage for one person with gear, while 10x12 feet accommodates two people or one person with more weather protection. Silnylon or DCF (Dyneema Composite Fabric, formerly Cuben Fiber) materials provide excellent performance at minimal weight. Budget options include common poly tarps—heavier and bulkier but very affordable and widely available.
Paracord or bankline provides essential cordage for tarp setup, gear hanging, and countless other camp tasks. Carry at least 50 feet of 550 paracord (genuine military spec rated to 550 pounds) or tarred bankline (preferred by some for bushcraft due to better knot holding and waterproof properties). Learn essential knots—bowline, taut-line hitch, clove hitch, trucker’s hitch—enabling secure, adjustable tarp setups.
Tent stakes or improvised anchors secure tarps and shelters. Ultralight stakes suffice for soft ground, while Y-stakes or MSR Groundhog stakes handle varied terrain better. In rocky areas or snow, learn to improvise anchors using sticks, rocks, or buried objects. Carrying a few lightweight stakes provides options while keeping weight reasonable.
Natural Shelter Construction
Understanding how to build shelters from natural materials provides capability when equipment is lost, inadequate, or unavailable.
Debris huts create insulated shelters using frameworks of branches covered with thick layers of leaves, grass, and other natural materials. These primitive shelters provide surprising warmth through massive insulation—12-24 inches of debris creates dead air space that retains body heat effectively. Construction requires significant time and energy but uses only natural materials. Debris huts work well in deciduous forests where ample leaves exist but are impractical in environments lacking sufficient insulation materials.
Lean-to shelters use angled framework creating one-sided protection against wind and precipitation. These simple structures build quickly using available materials—large branches for framework, smaller branches and foliage for covering. Lean-tos provide less protection than enclosed shelters but work well when combined with fires reflecting heat into shelters. Position lean-tos with backs to prevailing winds and openings facing fires for maximum effectiveness.
Snow shelters range from simple snow trenches to elaborate quinzhees and igloos. Snow provides excellent insulation when properly constructed—the key is creating dead air spaces and smooth interiors preventing dripping. Snow caves dug into drifts or banks offer superior protection when adequate snow exists. Quinzhees (hollowed snow piles) work when snow isn’t deep enough for caves. These shelters require significant effort but provide remarkable warmth—interior temperatures often reach 32°F (0°C) even when outside temperatures plunge far below zero.
Natural features like caves, overhangs, and fallen trees provide ready-made shelter requiring minimal modification. However, carefully evaluate these locations for hazards—rockfall risk, animal dens, flooding potential, widowmaker branches overhead. Improve natural shelters by adding windbreaks, insulation, or fire reflectors without compromising structural integrity.
Sleeping Systems and Insulation
Proper insulation from ground and air maintains body temperature, preventing hypothermia even with adequate shelter.
Sleeping bags rated for expected temperatures provide crucial insulation. Temperature ratings indicate lowest temperature bags handle comfortably—choose bags rated at least 10-15°F below your expected lowest temperatures. Down insulation provides excellent warmth-to-weight ratio but loses insulation when wet; synthetic insulation weighs more but maintains warmth when damp and costs less. Consider your typical environments and budgets when choosing. Mummy-style bags retain heat better than rectangular bags through reduced air space.
Sleeping pads insulate from ground, preventing heat loss through conduction. Ground sucks heat from bodies far faster than air, making insulation beneath you as important as above. Sleeping pad R-values indicate insulation levels—R-1 to R-2 suffices for summer, R-3 to R-4 handles three-season use, R-5+ works for winter. Closed-cell foam pads (like Therm-a-Rest Z Lite) are nearly indestructible and always work but are bulky. Inflatable pads compress small but can puncture—carry repair kits. Combining thin closed-cell foam with inflatable pads provides redundancy and superior insulation.
Improvised insulation from natural materials works when pads aren’t available. Pine boughs, dry leaves, grass, and other materials create barriers between you and ground. Pile materials thick—at least 6-8 inches—for adequate insulation. This takes time and effort but dramatically improves comfort and safety compared to sleeping directly on cold ground.
Shelter Location Selection
Where you build shelter matters as much as what you build—location selection affects safety, comfort, and environmental impact.
Avoid hazardous locations including valley bottoms where cold air pools, directly under dead branches or unstable rocks that could fall, drainage paths that could flood during rain, exposed ridges catching maximum wind, and areas with signs of animal activity. Look up, down, and around, evaluating all potential hazards before committing to locations.
Choose favorable features like natural windbreaks, level ground without rocks or roots, proximity to water (but not too close—50-200 feet ideal for Leave No Trace and flood safety), and availability of firewood and shelter materials. Morning sun exposure helps dry and warm camps early.
Minimize environmental impact by using existing disturbed sites when available, avoiding fragile vegetation, and not cutting live trees or damaging bark. Leave camps cleaner than you found them, naturally obscuring your presence.
Shelter Accessories and Improvements
Simple additions to basic shelters dramatically improve comfort and functionality.
Ground cloths protect sleeping bags and provide moisture barriers. These can be dedicated footprints, plastic sheeting, or even extra tarps. Keeping sleeping bags dry dramatically extends their insulation effectiveness and lifespan.
Ventilation prevents condensation buildup that dampens insulation and creates discomfort. Even in cold weather, leave some airflow to prevent moisture accumulation. Wipe condensation from shelter interiors regularly.
Fire reflectors concentrate heat toward shelters, dramatically improving warmth from fires. Position large logs or rock walls opposite shelters from fires, creating surfaces that absorb and radiate heat back toward you. This simple improvement makes open shelters far warmer.
Insect protection becomes critical in buggy seasons and environments. Mesh netting, permethrin-treated fabric, or sealed bivy bags prevent mosquitoes, ticks, and other insects from ruining sleep and potentially transmitting diseases. Budget permethrin treatments for gear provide excellent insect protection lasting through multiple washings.
Shop on AliExpress via link: wholesale-emergency-shelter
Understanding shelter—from emergency equipment through natural construction to sleeping systems—ensures you can protect yourself from environmental threats across all conditions. Practice building various shelter types in controlled conditions, developing skills and speed. Carry appropriate emergency shelter materials for your activities, even on day trips where unexpected overnights could occur. Choose sleeping systems appropriate for expected conditions, erring toward warmer ratings when uncertain. Select shelter locations carefully, balancing safety, comfort, and environmental responsibility.
6. Navigation Tools and Signaling Devices
Getting lost represents one of the most common outdoor emergencies, often escalating minor problems into serious situations through panic, poor decisions, and unnecessary exposure. Understanding navigation equipment and techniques, combined with effective signaling capability, prevents many emergency situations while providing means to summon help when needed.
Traditional Navigation Tools
Despite GPS technology dominance, traditional navigation tools remain essential for serious outdoor activities and survival preparedness.
Topographic maps show terrain features through contour lines, enabling route planning, position determination, and terrain interpretation. Quality topographic maps for your areas provide critical information that digital devices can’t match when batteries die or electronics fail. USGS 1:24,000 scale maps (7.5 minute quadrangles) offer excellent detail for hiking and land navigation in the United States. Learn to read contour lines understanding elevation changes, identify terrain features, and correlate map features with actual landscape.
Compasses determine direction through magnetic needles aligning with Earth’s magnetic field. Quality baseplate compasses (like Silva or Suunto) combine compass with rulers, scales, and rotating bezels enabling precise navigation. Learn fundamental compass skills—taking bearings, following bearings, triangulation for position determination, declination adjustment for magnetic variation. Practice these skills regularly; they’re perishable abilities requiring maintenance.
Waterproof map cases protect maps from rain, snow, and general wear. These inexpensive accessories dramatically extend map life while keeping them readable in any conditions. Alternatively, laminate critical maps or print on waterproof paper.
Altimeters measure elevation, providing additional information for position determination when combined with maps and compasses. Barometric altimeters in watches or dedicated devices help confirm location on maps, particularly in mountainous terrain where elevation narrows position possibilities significantly.
GPS Devices and Technology
Modern GPS technology provides remarkable navigation capability, but understanding limitations and using devices properly prevents over-reliance on systems that can fail.
Dedicated GPS units from Garmin, Suunto, and others offer superior battery life, durability, and functionality compared to smartphones for serious outdoor navigation. These devices include topographic maps, waypoint marking, track recording, and various navigation features. Battery life extends from 16-48 hours depending on settings and models—far exceeding smartphone battery life. Carrying extra batteries or solar chargers provides extended operation.
Smartphone GPS apps like Gaia GPS, AllTrails, or CalTopo provide powerful navigation using existing devices you already carry. Download offline maps for areas lacking cell coverage—GPS functions without cellular signal by receiving satellite data. However, smartphones drain batteries quickly, screens wash out in bright sun, and devices aren’t as rugged as dedicated GPS units. Use smartphones for navigation on short trips in good weather while carrying traditional navigation backup.
GPS limitations include dependency on batteries and electronics that can fail, satellite signal requirements (blocked in heavy forests or canyons), and accuracy variations based on satellite coverage and atmospheric conditions (typically 10-30 feet accuracy but sometimes worse). Never rely entirely on GPS—always carry map and compass as backup, knowing how to navigate without electronics.
Personal Locator Beacons (PLBs) transmit distress signals via satellite networks when activated, alerting search and rescue coordination centers worldwide to emergencies with your GPS position. Unlike satellite messengers requiring subscriptions, PLBs have no ongoing fees after initial purchase and work globally via government-operated satellite networks (COSPAS-SARSAT system). However, PLBs only communicate one-way—you can’t send custom messages or receive confirmations. These devices should only be activated in genuine emergencies requiring professional rescue.
Satellite messengers like Garmin inReach or SPOT provide two-way communication and GPS tracking through commercial satellite networks. These devices send and receive text messages, share GPS locations, request help with varying urgency levels, and provide weather forecasts. Annual subscription fees fund satellite network access. Satellite messengers provide communication capability beyond just emergency use, valuable for checking in with contacts, coordinating logistics, and getting weather updates.
Navigation Techniques
Effective navigation combines equipment with proper techniques and decision-making.
Terrain association correlates map features with observed landscape, continuously confirming position through matching visible terrain to map representations. This intuitive navigation works well for experienced navigators in clear conditions but requires map-reading skills and environmental observation abilities.
Dead reckoning tracks position through recording direction and distance traveled, updating estimated position based on movement. This technique works when visual confirmation isn’t possible—fog, darkness, dense forest—but accumulates errors over distance. Combining dead reckoning with periodic position confirmation through terrain association or GPS provides reliable navigation.
Handrail navigation follows linear features like trails, streams, ridges, or roads, simplifying navigation and preventing getting lost. Identifying handrail features during route planning and utilizing them whenever possible reduces navigation complexity.
Catching features are prominent terrain features (roads, large streams, distinct peaks) positioned to intercept your travel if you drift off course. Identifying catching features during planning provides safety nets—if you hit the catching feature, you know you’ve gone off route and can correct.
Backstops are large, unmistakable features you’ll definitely encounter if you go too far—roads, major rivers, coastlines, etc. Knowing your backstop prevents wandering indefinitely in wrong directions.
Signaling Equipment and Techniques
When lost or injured, effective signaling dramatically improves rescue chances by helping searchers locate you.
Signal mirrors reflect sunlight over enormous distances—many miles on sunny days. Quality signal mirrors include aiming devices (sight holes or mesh) enabling precise aiming at aircraft or distant search teams. Practice mirror signaling before needing it—the technique isn’t intuitive. Flash deliberately in threes (universal distress signal), aiming reflected light directly at potential rescuers.
Whistles carry farther than voices while requiring less energy than shouting. Three short blasts indicate distress. Pealess whistles (like Fox 40) work even when wet, never jamming unlike whistles with small balls. Attach whistles to pack straps for instant access—you can’t signal if equipment is buried in packs.
Signal fires create smoke visible for miles. Green vegetation added to hot fires creates white smoke contrasting against forests. Burning pine boughs or adding oil to fires creates black smoke visible against snow or clouds. Three fires in triangle pattern signals distress. Prepare signal fires in advance so you can light them quickly when aircraft or searchers appear.
Colored panels or tarps spread on ground create visual contrast visible from aircraft. International orange, bright yellow, or any vivid color works—the goal is contrast against natural backgrounds. Arrange panels in large X patterns or other geometric shapes obviously artificial. Stomp large patterns in snow or sand, creating shadows visible from altitude.
Flashlights or strobes signal at night. Three flashes repeated signals distress. Strobe lights visible for miles in darkness dramatically aid night searches. Headlamps provide hands-free signaling capability.
Electronic distress signals from PLBs or satellite messengers provide most reliable signaling by transmitting your exact position directly to rescue coordination centers. Activate these devices in genuine emergencies, understanding that doing so initiates expensive search and rescue operations with potential legal and financial consequences for frivolous use.
Preventing Getting Lost
Prevention is far better than cure when it comes to getting lost—proper planning and ongoing awareness prevent most navigation emergencies.
Trip planning before departing identifies key waypoints, potential hazards, escape routes, and time estimates. Study maps thoroughly, identifying terrain features, water sources, campsites, and emergency routes. Share plans with reliable contacts including routes, timelines, and emergency plans.
Constant awareness of position throughout trips—called maintaining situational awareness—prevents gradual drift into uncertainty. Regularly check maps, note landmarks, and confirm you’re where you think you are. Catching navigation errors early when you’re slightly off course is far easier than recovering after completely losing position.
Staying found is easier than getting found—when uncertain of position, stop and assess rather than wandering hoping to find familiar territory. Moving when lost increases distances from intended locations and search areas. If genuinely lost, stay put (making yourself easier to find), signal your location, conserve energy, and wait for help unless you’re absolutely certain of direction to safety.
Shop on AliExpress via link: wholesale-compass
Understanding navigation—from traditional map and compass through modern GPS to effective signaling—provides confidence for wilderness travel while ensuring you can find your way or summon help when needed. Carry redundant navigation tools, never relying on single systems. Practice navigation skills regularly in familiar areas before applying them in remote locations. Plan trips carefully, maintain awareness throughout, and don’t hesitate to turn back when conditions exceed your capabilities or comfort level.

7. First Aid and Medical Supplies
Medical emergencies in remote locations lack immediate professional help, making first aid knowledge and appropriate medical supplies critical for handling injuries and illnesses until you can reach medical care or help arrives. Understanding what medical supplies to carry and how to use them effectively can prevent minor issues from becoming serious problems while providing crucial care for major injuries.
First Aid Kit Essentials
Effective first aid kits balance comprehensiveness with weight and cost, tailored to trip lengths, group sizes, environments, and medical training levels.
Wound care supplies treat cuts, abrasions, and punctures—the most common outdoor injuries. Include adhesive bandages in various sizes, gauze pads (4x4 inch), gauze rolls for wrapping, adhesive tape, butterfly closures or Steri-Strips for wound closure, antibiotic ointment, and irrigation syringe. Extensive bleeding requires pressure bandages or hemostatic gauze accelerating clotting.
Blister treatment prevents and treats friction injuries that can cripple mobility. Moleskin or Leukotape provides protective padding and reduces friction. Treat hot spots (areas of irritation) immediately before blisters form by applying protective tape or padding. Lance developed blisters with sterile needles, drain fluid, apply antibiotic ointment, and cover with blister-specific bandages.
Pain relievers and medications address discomfort and specific conditions. Include ibuprofen or naproxen (anti-inflammatory pain relievers), acetaminophen (pain reliever without anti-inflammatory effects), antihistamine for allergic reactions, anti-diarrheal medication, and any personal prescription medications with extras in case of delays. Consider altitude sickness medication (Diamox) for high-elevation activities.
Wound closure tools become necessary for injuries beyond simple bandaging. Include surgical tape, butterfly bandages, or wound closure strips. Those with advanced training might include suture kits, though suturing requires proper training and should only be attempted in genuine remote emergencies when professional care is impossible.
Trauma supplies address serious injuries requiring immediate intervention. Include triangular bandages for slings and wraps, SAM splints for fractures, elastic bandages for sprains, hemostatic gauze for severe bleeding, and CPR face shields. The more remote and longer your trips, the more comprehensive trauma supplies should be.
Medical tools include scissors (EMT shears cut through fabric and gear), tweezers (splinter and tick removal), safety pins, thermometer, and irrigation syringe. Quality multi-tools often include scissors and tweezers, reducing redundancy.
Specific environmental considerations include tick removal tools for tick-prone areas, insect sting treatment including epinephrine auto-injectors (EpiPens) if anyone has severe allergies, sunscreen and lip balm, water purification tablets as backup, and hypothermia prevention (space blankets, chemical heat packs).
Pre-Assembled vs. Custom First Aid Kits
Choosing between commercial kits and building custom kits depends on experience level, specific needs, and budget.
Commercial first aid kits from Adventure Medical Kits, Surviveware, or similar companies provide curated supplies for specific activities and group sizes. These kits include comprehensive supplies organized in quality cases, removing guesswork from deciding what to include. However, they often contain items you won’t need while lacking things you do, and generally cost more than assembling equivalent kits from individual components.
Custom-built kits allow tailoring exactly to your needs, experience level, and trip characteristics. Start with commercial kit as foundation, then add, remove, or modify contents based on experience. Replace depleted items individually rather than buying entire new kits. Custom kits require more knowledge to assemble properly but provide superior matching to actual needs.
First Aid Training
Equipment without knowledge provides limited benefit—proper training dramatically improves your effectiveness in medical emergencies.
Basic first aid courses teach fundamental injury and illness treatment—CPR, choking response, bleeding control, fracture stabilization, basic wound care. These courses typically take 4-8 hours, with certification valid for two years. Organizations like American Red Cross and American Heart Association offer standardized training accessible nationwide.
Wilderness first aid addresses specific challenges of remote environments where evacuation takes hours or days rather than minutes. Extended patient care, improvisation with limited supplies, environmental injury treatment (hypothermia, altitude sickness, etc.), and evacuation decision-making receive emphasis. Wilderness First Aid (WFA) courses take 16-20 hours over 2-3 days.
Wilderness First Responder (WFR) provides advanced wilderness medical training over 70-80 hours (8-10 days). This comprehensive training covers extended patient assessment and care, dealing with serious injuries and illnesses in remote settings, making difficult decisions about treatment and evacuation, and managing group dynamics during emergencies. WFR certification is often required or strongly recommended for outdoor professionals—guides, instructors, expedition leaders.
Specialty training in wilderness medicine topics includes altitude illness prevention and treatment, cold injuries (frostbite, hypothermia), heat illness, snake bite treatment, tick-borne disease awareness, and wilderness dental emergencies. Seek specialized training for environments and activities where specific risks are elevated.
Common Outdoor Medical Issues
Understanding frequently encountered medical problems improves prevention and treatment.
Dehydration and heat illness progress from heat cramps to heat exhaustion to life-threatening heat stroke. Prevention through adequate hydration, electrolyte replacement, and avoiding overexertion in heat is far better than treatment. Recognize early symptoms—excessive thirst, dark urine, fatigue, headache—intervening before progression to serious conditions.
Hypothermia occurs when core body temperature drops below 95°F (35°C), causing shivering, confusion, loss of coordination, and eventually unconsciousness and death. Prevention through proper clothing, staying dry, adequate food, and avoiding exhaustion is crucial. Treatment involves preventing further heat loss, gradual rewarming, and providing warm beverages and food if patient is alert.
Blisters develop from friction between skin and footwear during extended hiking. Prevention includes proper-fitting boots, moisture management with liner socks, immediately addressing hot spots before blisters form. Once blisters develop, drain them with sterile needles, apply antibiotic ointment, and cover with blister-specific bandages providing cushioning while allowing healing.
Sprains and strains result from overstretching or tearing ligaments and muscles. RICE protocol (Rest, Ice, Compression, Elevation) treats these injuries. Wrap with elastic bandages providing support, reduce swelling with cold water if ice isn’t available, and minimize use. Severe sprains may require splinting and evacuation.
Cuts and lacerations need cleaning, bleeding control through direct pressure, and proper dressing. Deep wounds potentially requiring stitches should be closed with butterfly bandages or wound strips if professional care is hours or days away. Watch for infection signs—increased pain, redness, swelling, pus, fever—requiring antibiotics and possibly evacuation.
Fractures require immobilization preventing movement at fracture site and joints above and below fracture. SAM splints mold to body parts providing excellent support with minimal weight. Padding prevents pressure points. Most fractures require evacuation for proper treatment.
Medication Management
Carrying and using medications properly ensures they remain effective when needed.
Storage conditions affect medication potency. Heat, light, and moisture degrade many medications. Store in sealed containers protecting from elements. Avoid leaving medications in direct sunlight or hot vehicles. Replace medications approaching expiration dates.
Proper dosing requires reading labels and following instructions. Don’t exceed recommended doses. Children require adjusted dosing based on weight—know proper pediatric doses if carrying children’s medications. Track medication timing, especially for antibiotics requiring specific intervals.
Allergies and contraindications matter—know if you or group members have medication allergies. Understand interactions between medications—some combinations are dangerous. When in doubt, consult with medical professionals before trips.
Prescription medications require planning for trips exceeding normal refill schedules. Obtain extra supplies from prescribing doctors, explaining travel plans. Carry prescriptions in original containers with labels intact, particularly when traveling internationally where customs may question unlabeled medications.
Medical Documentation and Communication
Recording medical information and effectively communicating with professional rescuers improves patient outcomes.
Patient assessment and documentation track injuries, vital signs, treatments, and changes over time. Simple notes with timestamps provide crucial information for professional responders. Include patient name, age, medical history, injury description, vital signs, treatments administered, and response to treatment.
Communication with emergency services requires clear, concise information. Be prepared to provide your location (GPS coordinates or clear landmarks), nature of emergency, number of people injured, extent of injuries, treatments provided, and any hazards responders should know about. Stay calm, speak clearly, and follow dispatcher instructions.
Understanding first aid—from kit contents through proper training to treating common injuries—provides crucial capability for outdoor adventures and emergencies. Carry appropriately comprehensive first aid kits tailored to activities and group sizes. Obtain proper training matching your adventure level, refreshing skills regularly. Practice basic first aid techniques before needing them in stressful emergencies. Prioritize prevention through proper planning, appropriate caution, and good decision-making, as avoiding injuries is far better than treating them.
8. Multi-Tools and Everyday Carry Essentials
Multi-tools and carefully selected EDC (Everyday Carry) items provide versatile capability in compact, portable packages suitable for daily carry regardless of whether you’re heading into wilderness or just going about normal life. Understanding quality tools and thoughtful EDC selection creates layered preparedness from everyday utility through emergency capability.
Multi-Tool Selection and Features
Modern multi-tools combine numerous implements into integrated packages, providing toolkit capabilities in pocket-sized formats.
Plier-based multi-tools pioneered by Leatherman center designs around full-size pliers with additional tools folding into handles. These excel at gripping, cutting wire, crimping, and tasks requiring significant clamping force. Quality models include knife blades, screwdrivers (multiple sizes and types), scissors, file, saw, and wire strippers. Full-size models (Leatherman Wave+, Surge) offer maximum capability but weigh 7-9 ounces. Compact versions (Leatherman Skeletool, Signal) reduce weight to 5-6 ounces while sacrificing some tools.
Swiss Army Knife style multi-tools from Victorinox prioritize compact size and tool variety over heavy-duty capability. These slender multi-tools slip easily into pockets, providing scissors, knife blades, screwdrivers, tweezers, toothpicks, and countless specialized tools depending on models. While not as robust as plier-based tools, Swiss Army Knives excel for light-duty tasks and detailed work. Models range from simple pocket knives with few tools to extensive versions including USB drives, flashlights, and 30+ tools.
Specialized multi-tools address specific needs—Leatherman Signal adds fire starter and emergency whistle for outdoor focus, Leatherman Rebar emphasizes heavy-duty construction trades use, Gerber Center-Drive positions screwdriver bits at tool center for proper ergonomics. Consider your most common tasks and environments when selecting among options.
Tool access varies between multi-tools—exterior-accessible tools allow using specific implements without opening entire tool, while others require unfolding handles accessing internal tools. Exterior access provides convenience for frequently used tools like knife blades.
Carry methods include dedicated sheaths, pocket clips, or belt holsters. Consider how you’ll actually carry tools daily—pocket carry requires compact sizes, while belt carry accommodates larger tools but is less convenient for office environments.
Essential EDC Items
Beyond multi-tools, specific items form core everyday carry providing practical utility and emergency capability.
Quality pocket knives serve countless daily purposes from package opening to food preparation. Folding knives with locking mechanisms provide safety and one-hand operation. Blade length of 2.5-3.5 inches balances utility with legal compliance (many jurisdictions restrict longer blades). Quality brands include Benchmade, Spyderco, Buck, Kershaw, and numerous others. Choose based on blade steel, locking mechanism reliability, and ergonomic comfort.
Flashlights eliminate dependence on uncertain light sources, useful daily and critical in emergencies. Modern LED lights provide brilliant output in compact packages with extended battery life. Rechargeable lithium batteries reduce operating costs while maintaining performance. Carry options include keychain lights (10-50 lumens), EDC pocket lights (100-500 lumens), and larger tactical lights (500-1000+ lumens). Brands like Olight, Fenix, Streamlight, and Surefire offer quality across price ranges. Look for durability (impact and water resistance), output adjustability, and runtime appropriate for your needs.
Fire starters ensure you can create heat and light anywhere. Butane lighters work for most purposes—carry quality refillable lighters or multiple cheap Bic lighters. Ferrocerium rods provide backup working in all conditions without consumables or expiration. Waterproof matches in sealed containers add another backup layer. Carry redundant fire starting methods across different pockets or bags.
Paracord serves countless purposes from gear repair to emergency shelter construction. Carry 10-20 feet in EDC, either loosely bundled or woven into useful items like bracelets, lanyards, or key fobs. True 550-spec paracord provides reliable strength—beware cheap imitations using inferior materials.
First aid supplies in EDC scale should include adhesive bandages, antiseptic wipes, pain relievers, any personal medications, and perhaps small amounts of gauze and tape. Numerous companies offer compact first aid tins fitting pockets. Alternatively, assemble minimal kits in Altoids tins or similar small containers.
Writing implements remain relevant despite digital devices—waterproof notebooks and pens work regardless of batteries, weather, or technology failures. Rite in the Rain notebooks and Space Pens or Fisher Space Pens function in extreme conditions.
EDC Organization and Systems
Effective EDC requires thoughtful organization ensuring items are actually carried consistently rather than left behind due to inconvenience.
Pocket organization assigns specific items to specific pockets based on frequency of use, safety (sharp objects away from fumbling hands), and efficiency. Common organization places knife and flashlight in dominant hand pocket for quick access, wallet and phone in non-dominant pocket, keys separately to avoid scratching phone. Experiment finding what works for your preferences and daily activities.
Small pouches or organizers consolidate multiple smaller items, preventing them from scattering loose in pockets or bags. Maxpedition, Vanquest, and numerous other companies offer compact pouches purpose-built for EDC organization. Even simple zippered pouches work well for organizing first aid supplies, electronics cables, or miscellaneous items.
Belt carry using holsters or cases accommodates multi-tools, larger flashlights, or items too bulky for pockets. However, belt carry is less convenient in office or professional environments and less concealable. Consider your typical environments when deciding between pocket and belt carry.
Bag carry expands capacity for additional items beyond what pockets hold. Daily bags (briefcases, backpacks, purses) can include more extensive first aid kits, additional tools, food, water, and other supplies creating portable mini-kits for work commutes or daily errands.
Maintenance and Care
EDC items endure constant handling and varied conditions, requiring maintenance ensuring continued reliability.
Cleaning removes dirt, debris, and accumulated grime affecting tool function. Multi-tools benefit from periodic disassembly and cleaning using appropriate lubricants. Knives require blade cleaning and oiling, particularly carbon steel preventing rust. Flashlights need battery contact cleaning and o-ring lubrication maintaining water resistance.
Sharpening keeps knife edges functional. Carry small pocket sharpening stones or compact sharpening systems maintaining edges during trips. More extensive sharpening using whetstones or guided systems happens at home during regular maintenance.
Replacement addresses worn or broken components. Most quality multi-tools allow replacing knife blades, saw blades, and other consumable elements. Flashlight batteries obviously require periodic replacement. Inspect EDC items regularly, replacing worn elements before failures occur during critical moments.
Testing periodically ensures items work when needed. Open and close knife locks, test flashlight output, verify lighters spark, and check that multi-tool implements operate smoothly. Address issues during routine testing rather than discovering problems when needing items urgently.
Legal and Social Considerations
EDC practices must account for legal restrictions and social appropriateness varying across locations and situations.
Knife laws vary dramatically between jurisdictions regarding blade lengths, locking mechanisms, carry methods, and prohibited locations. Research applicable laws for locations you frequent, selecting knives complying with local restrictions. Never carry prohibited items regardless of perceived usefulness.
Workplace policies may restrict certain items even if legally carried outside work. Respect employer policies to avoid termination or legal issues. Consider leaving certain EDC items secured in vehicles during work hours.
Social appropriateness influences what you choose to carry and display. Tactical or military-styled gear may be completely acceptable in rural or outdoor-focused communities but create unnecessary attention or concern in urban or professional environments. Choose EDC items balancing capability with discretion appropriate for your daily contexts.
Shop on AliExpress via link: wholesale-multi-tool
Understanding multi-tools and EDC principles enables building practical everyday carry systems providing genuine utility while maintaining emergency preparedness. Choose quality tools matching your needs and budget, avoiding cheap imitations that fail when needed. Organize carries thoughtfully, ensuring consistency despite daily routine variations. Maintain items properly, preserving reliability and longevity. Balance capability with legal compliance and social appropriateness, selecting items suitable for your specific environments and activities.
9. Food Procurement and Preparation Tools
While humans can survive weeks without food, maintaining energy and morale requires adequate nutrition during extended survival situations or wilderness excursions. Understanding food procurement tools and techniques, combined with proper food preparation equipment, ensures you can supplement carried supplies or provide sustenance when other options are unavailable.
Fishing Equipment
Fishing offers one of the most reliable food procurement methods in areas with water, requiring relatively simple equipment and learnable techniques.
Fishing line and hooks form the basic fishing kit. Carry 50-100 feet of monofilament line (20-30 pound test provides good balance between strength and versatility) and assorted hooks (sizes 6-12 cover most fishing). These items weigh almost nothing and store in tiny spaces. Add split shot sinkers and bobbers expanding technique options. Spinners or other simple lures improve success rates.
Fishing poles improve casting distance and control but aren’t necessary for survival fishing. Collapsible telescoping poles pack reasonably small while providing traditional fishing capability. However, hand lines work adequately for most survival fishing situations—wrapping line around sticks or bottles creates functional reels requiring no specialized equipment.
Fishing techniques for survival prioritize simplicity and effectiveness over sport. Set lines (unattended lines with baited hooks) allow fishing while doing other tasks. Trotlines (multiple hooks on single line stretched across streams) multiply catch potential. Bank fishing (casting from shore) works well with portable or improvised poles. Learn which techniques are legal in your areas—some jurisdictions restrict certain methods during normal times, though survival situations may create different priorities than sport fishing regulations.
Trapping and Hunting Tools
While more complex than fishing, trapping and hunting provide protein in various environments when necessary skills and equipment exist.
Snare wire enables creating simple traps for small game. Brass or stainless steel wire in 20-24 gauge works well for rabbit-sized animals. Learn legal snare designs and proper placement techniques through training rather than trial and error—improper snaring causes unnecessary animal suffering. Many survival situations won’t justify trapping, but understanding principles provides options for extended survival scenarios where food depletion becomes critical.
Air rifles or firearms provide hunting capability when legal and appropriate. However, guns add significant weight, require permits and legal compliance, demand considerable skill for effective use, and create safety concerns. Most recreational outdoor activities don’t justify carrying firearms primarily for survival—other food options work better for typical scenarios. Serious wilderness expeditions in specific environments might include firearms for both food procurement and defense against dangerous wildlife, but this remains specialized preparation beyond general survival kits.
Slingshots provide lightweight hunting capability for small game and birds. Modern wrist-braced slingshots generate surprising power with practice. However, effective slingshot hunting requires considerable skill development—don’t expect reliable success without extensive practice.
Foraging Equipment and Knowledge
Plant-based foods supplement or replace animal protein when identified correctly and prepared properly.
Foraging guides specific to your regions provide crucial identification information. Books like “Edible Wild Plants” field guides organized by region detail which plants are safe, where to find them, what parts are edible, and how to prepare them. However, books alone don’t provide adequate safety—positive identification requires absolute certainty, as some toxic plants closely resemble edible species. Consider formal foraging courses teaching identification through hands-on experience with expert guidance.
Digging tools help harvest root vegetables and tubers. Small trowels or sturdy sticks suffice for most foraging, though dedicated digging tools work better for extensive harvesting.
Collection bags or containers carry foraged foods back to camp. Mesh bags allow ventilation preventing wilting or spoilage during collection.
Universal edibility test provides last-resort method for testing unknown plants when starvation is imminent and proper identification is impossible. This multi-step process (testing for skin irritation, mouth irritation, digestive upset, etc.) takes 24+ hours per plant and still carries risks. Learn the test procedure but recognize it’s desperation measure when proper identification isn’t possible—not substitute for proper plant knowledge.
Food Preparation Equipment
Successfully procuring food requires ability to prepare it safely and palatably.
Cooking pots and containers enable boiling, which makes many foods safer and more digestible while purifying water simultaneously. Lightweight titanium or aluminum pots balance durability with minimal weight. Pot size around 1-1.5 liters suits individual use, while larger pots serve groups. Folding handles reduce packed size. Lids dramatically improve fuel efficiency by retaining heat.
Stoves provide controlled heat for cooking when fires aren’t practical or allowed. Compact backpacking stoves (canister, alcohol, or solid fuel types) weigh just ounces while providing reliable cooking capability. Fuel availability influences stove selection—canister stoves offer excellent performance but require carrying fuel canisters, alcohol stoves use readily available fuel, and wood-burning stoves use natural materials but require more attention.
Cutting boards and preparation surfaces keep food clean during processing. Small lightweight cutting boards designed for backpacking work well, or improvise using flat rocks or wood cleaned carefully.
Mess kits consolidate eating utensils, plates, cups, and sometimes cooking pots into compact systems. However, many people prefer selecting individual items matching their specific needs rather than accepting compromise inherent in all-in-one kits.
Food Storage and Preservation
Procured food requires proper storage preventing spoilage and protecting from animals.
Bear canisters or bear bags protect food from wildlife in areas with bear activity. Many regions require approved bear-resistant storage methods. Hanging food bags work in areas without bears but requires proper technique preventing access from smaller animals.
Waterproof bags protect food from moisture. Dry bags in various sizes keep food dry during water activities or rain. Ziplock bags provide inexpensive waterproofing for individual meal portions.
Smoking and drying preserve meat and fish without refrigeration. Constructing smoke houses or drying racks from natural materials preserves excess food for later consumption. These traditional preservation methods require time and attention but enable storing protein-rich foods extending successful hunting or fishing beyond immediate consumption.
Salting preserves meat and fish through dehydration and antibacterial effects. While salt is heavy to carry for preservation purposes, in coastal areas or areas with natural salt deposits, this traditional preservation method works well.
Foraging Safety and Ethics
Ethical and safe foraging requires knowledge, caution, and environmental responsibility.
Positive identification is absolutely critical—never eat plants without 100% certainty of identification. Numerous toxic plants closely resemble edible species. The consequences of misidentification can be fatal. When in doubt, don’t eat it. No meal is worth the risk of poisoning in survival situations where medical help is distant or unavailable.
Start small with unfamiliar foods even when positively identified. Some edible plants cause digestive upset in some individuals despite being generally safe. Eating small amounts initially limits potential problems while allowing you to assess personal tolerance.
Leave some for ecosystems by not over-harvesting. Take only what you need, leaving plants viable for regeneration and wildlife that depends on them. Some plants can be harvested sustainably (picking outer leaves while leaving growing centers intact), while others suffer from any harvesting.
Know regulations regarding foraging, hunting, and fishing in your areas. Many locations restrict or prohibit food procurement even in survival situations. Understanding regulations prevents legal problems, though genuine life-or-death survival situations create different priorities than regulatory compliance.
Shop on AliExpress via link: wholesale-fishing-gear
Understanding food procurement—from fishing through foraging to proper preparation—provides capability for extended wilderness time while offering potential sustenance in genuine survival situations. However, recognize that food procurement requires significant skill, time, and often luck. Carrying adequate food remains far more reliable than depending on hunting, fishing, or foraging for sustenance. Learn procurement skills as interesting capabilities and potential last resorts rather than primary food plans for outdoor activities.
10. Building Your Complete Survival Kit
Assembling comprehensive, functional survival kits requires balancing numerous considerations—potential scenarios, weight limitations, budgets, skill levels, and specific activities. Understanding systematic approaches to kit building ensures you create useful, reliable equipment systems rather than random collections of gear.
Layered Kit Philosophy
Effective preparedness uses layered approach with different capability levels for different carrying options and scenarios.
EDC layer contains minimal essential items carried on person always—pocket knife, lighter, small flashlight, basic first aid. This layer weighs almost nothing and requires no conscious carrying decision. Even stripped of all other gear, EDC provides fundamental capability.
Day pack layer adds equipment for several hours away from vehicles or base camps—additional water, food, extra clothing layers, more comprehensive first aid, emergency shelter, and supplementary tools. This layer weighs 5-15 pounds, easily carried on short trips while dramatically expanding capability.
Extended trip layer includes everything needed for multi-day wilderness excursions—sleeping bags, shelters, cooking equipment, extensive food and water, comprehensive tool sets, and serious first aid supplies. This layer weighs 25-50+ pounds depending on trip length and comfort priorities.
Vehicle or base camp layer provides extensive supplies not carried while hiking—bulk food and water, extra clothing, comprehensive tool collections, extensive medical supplies, and comfort items. This layer has minimal weight restrictions since it remains stationary.
Home emergency layer includes supplies for extended emergencies—weeks of food and water, comprehensive tools and equipment, extensive medical supplies, important documents, and preparations for various disaster scenarios.
Kit Organization Principles
Organizing kits logically ensures you can find and use equipment efficiently, particularly under stress when fine motor skills and cognitive function may be impaired.
Categorize by function, grouping related items together—all fire starting in one location, all first aid in another, water purification separate, etc. This organization allows quickly locating categories rather than hunting through random collections.
Use nested containers efficiently using dead space inside pots, cups, or other hollow items. This compact organization maximizes space utilization while keeping small items from scattering loose.
Mark and label contents clearly, particularly for medical supplies or items used infrequently. Under stress, obvious labeling prevents confusion and wasted time searching.
Keep frequently used items easily accessible rather than buried at pack bottoms. Items needed quickly (first aid, fire starting, emergency shelter) should be readily available without unpacking extensively.
Protect critical items from damage and moisture using waterproof containers, padding fragile equipment, and organizing to prevent sharp items from damaging other gear.
Building Kits for Specific Scenarios
Different scenarios require different equipment focuses and priorities.
Day hiking kits prioritize lightweight emergency essentials—basic first aid, emergency shelter (space blanket or emergency bivy), extra water or purification, snacks, fire starting, navigation (map, compass, GPS), flashlight or headlamp, whistle, and basic repair items. These kits weigh just 2-4 pounds, easily carried on any hike while providing genuine emergency capability if day trips extend unexpectedly.
Backpacking kits include full camping equipment—sleeping bag and pad, shelter (tent or tarp), cooking equipment and fuel, food for trip duration plus extras, comprehensive first aid, water purification, navigation tools, repair kit, hygiene items, and clothing layers. These kits weigh 20-40 pounds depending on trip length, weather conditions, and comfort priorities.
Vehicle emergency kits prepare for car breakdowns or accidents—jumper cables, tools for basic repairs, tire repair or inflator, flashlight with extra batteries, emergency food and water (week supply), blankets or sleeping bags, first aid kit, fire extinguisher, flares or reflective triangles, and basic hygiene supplies. These kits stay in vehicles, so weight is less critical than comprehensiveness.
Urban emergency kits address disasters like earthquakes, hurricanes, or extended power outages—water (gallon per person per day for 3-7 days), non-perishable food, comprehensive first aid, battery or hand-crank radio, flashlights and extra batteries, sanitation supplies, important documents in waterproof container, cash, and backup medications.
Bug-out bags prepare for rapid evacuation requiring survival away from home for 72+ hours—similar to backpacking kits but emphasizing portability over comfort. These bags stay packed and ready for immediate departure during emergencies requiring evacuation.
Testing and Refining Kits
Assembling kits is just the beginning—testing them in realistic conditions reveals what works, what’s missing, and what’s unnecessary.
Field test kits during actual activities matching intended uses. Use only what’s in your day hiking kit on real hikes, discovering if you’ve included everything needed. Camp using only backpacking kit contents, identifying gaps or redundancies.
After-action reviews following trips identify improvements—What worked well? What broke or failed? What did you wish you had? What dead weight never got used? Document lessons learned, refining kits based on actual experience rather than theoretical planning.
Seasonal adjustments account for changing conditions—winter kits need more insulation and cold-weather gear, summer kits emphasize sun protection and hydration, spring and fall transition seasons require flexible layering options.
Weight optimization removes unnecessary items identified through use. Every ounce matters when carrying equipment for hours or days. However, avoid removing critical safety items just to save weight—the lightest pack does no good if you lack capability handling emergencies.
Maintenance and Refresh Schedules
Survival kits require ongoing maintenance ensuring continued readiness.
Inspect quarterly or seasonally, checking for damage, verifying batteries work, ensuring food hasn’t expired, confirming medications remain current, and testing equipment function. Replace or repair any identified issues immediately.
Rotate perishable items like food, medications, batteries, and water. Even foods marketed as long-term storage eventually expire. Consume and replace items approaching expiration, maintaining fresh supplies.
Update kits as needs change—new family members require additional supplies, different activities demand different equipment, skill development enables carrying less redundant backup, and technology advances provide better options replacing old equipment.
Practice with equipment regularly maintaining familiarity with proper use. Emergency situations aren’t appropriate times for learning how equipment works. Regular practice builds muscle memory and confidence, dramatically improving performance when equipment is actually needed.
Budget Considerations
Building quality kits requires financial investment, but smart approaches maximize value while controlling costs.
Prioritize critical items—spend more on items you absolutely depend on (knives, fire starters, first aid, water purification) while economizing on less critical equipment. Quality basics beat cheap comprehensive kits.
Build gradually rather than buying everything at once. Start with fundamental essentials, adding items over time as budget allows. Spreading purchases across months or years makes costs more manageable while allowing you to learn what you actually need before spending extensively.
Buy once, cry once by choosing quality items that last rather than repeatedly replacing cheap failures. Calculate total cost of ownership—a $100 knife lasting decades costs less ultimately than multiple $20 knives each failing within months.
Seek sales and deals without compromising quality. End-of-season sales, used gear from reliable sources, and periodic promotions provide savings without settling for inadequate equipment.
Shop on AliExpress via link: wholesale-camping-gear
Building comprehensive survival kits requires systematic thinking, realistic testing, and ongoing refinement. Start with clear understanding of scenarios you’re preparing for, build layered kits appropriate for different carrying options, organize logically for efficient access, test thoroughly in realistic conditions, and maintain diligently ensuring continued readiness. Quality kits aren’t assembled overnight—they evolve through experience and reflection, ultimately providing genuine capability for adventures and potential emergencies.

Conclusion: Preparedness Meets Adventure
Survival tools and preparedness aren’t about fear or paranoia—they’re about capability, confidence, and connection to fundamental skills that have sustained humans throughout history. Whether you’re a weekend warrior exploring local trails, a serious adventurer pursuing remote expeditions, a prepper focused on emergency readiness, or simply someone appreciating self-reliance and practical skills, understanding survival equipment and techniques enriches your life while providing genuine security for unexpected situations.
The journey through survival preparedness reveals consistent themes that transcend specific tools or techniques. Balance is essential—between skills and equipment, between preparation and paranoia, between capability and burden. The best survival kit isn’t necessarily the most expensive or extensive but rather the one matching your actual needs, skill level, and carrying capacity while providing genuine capability for realistic scenarios you might face.
Quality matters more than quantity—a few well-chosen, properly maintained tools you truly understand outperform extensive collections of cheap gear you’ve never practiced with. Invest in items you’ll actually use regularly during normal outdoor activities rather than equipment that only comes out during disasters. The tools that enhance your camping trips and day hikes are the same ones providing survival capability when situations deteriorate unexpectedly.
Skills development deserves equal attention to equipment acquisition. The most expensive gear provides limited benefit without knowledge and practice applying it effectively. Conversely, skilled individuals with minimal equipment often fare better than those depending entirely on elaborate gear they barely understand. Dedicate time to learning and practicing fundamental skills—fire starting in various conditions, shelter construction from natural and artificial materials, water sourcing and purification, navigation without GPS, first aid application under realistic conditions.
Practice breeds confidence and competence that theoretical knowledge alone can’t provide. Spend weekends using your survival equipment, not just accumulating it. Camp using only what’s in your emergency kit, discovering what works and what’s missing. Practice fire starting when it’s wet and cold, not just perfect conditions. Navigate using map and compass rather than relying exclusively on GPS. These experiences build genuine capability while identifying equipment gaps or skill deficiencies in safe, controllable environments.
Layered preparedness provides security without burden—your EDC items come along automatically, day packs provide capability for unexpected overnights, vehicle kits handle breakdowns and emergencies, and home supplies prepare for disasters. This systematic approach ensures you’re never completely without resources while avoiding unnecessary weight during recreational activities.
Remember that survival situations rarely announce themselves in advance. The day hike that becomes an unexpected overnight, the vehicle that breaks down in remote area, the sudden weather change catching you unprepared—these mundane scenarios occur far more frequently than catastrophic disasters requiring bug-out bags and elaborate preparations. Focus your preparedness efforts on likely scenarios rather than solely preparing for apocalyptic situations, though comprehensive preparation naturally addresses both routine and extreme circumstances.
Environmental awareness naturally accompanies survival skills development. Learning which plants are edible, which materials burn well, where to find water, how to read weather patterns, and how to navigate by natural features transforms how you experience outdoors. This awareness enriches all outdoor activities while providing survival advantages when needed. You’ll never look at forests, deserts, or mountains the same way after understanding their survival resources and challenges.
The psychological benefits of preparedness extend beyond practical survival capability. Anxiety about potential emergencies decreases when you possess genuine tools and knowledge to handle challenges. Confidence increases as you develop real capabilities rather than hoping for rescue or depending entirely on modern infrastructure. Connection to fundamental skills grounds you in human heritage—people have always needed fire, water, shelter, and food; learning to provide these yourself connects you to that timeless human experience.
Share knowledge generously with others, teaching skills while learning from different perspectives. Survival preparedness becomes more enjoyable and effective when pursued as community interest rather than isolating solo obsession. Family camping trips teaching children fundamental outdoor skills, group skill-sharing sessions with friends, or formal training opportunities all expand capabilities while building relationships.
Legal and ethical considerations deserve ongoing attention. Understand regulations governing tools, techniques, and activities in your areas. Respect environmental impacts, practicing Leave No Trace principles. Consider how your preparedness practices affect others—don’t unnecessarily alarm people with excessive tactical gear in inappropriate settings. Balance personal security with social responsibility.
Technology continues advancing, providing new tools and capabilities that previous generations couldn’t imagine. Embrace useful innovations—modern water filters, LED lights, GPS devices, satellite communicators—while maintaining traditional skills as backup. The ideal approach integrates old and new, using technology’s conveniences while preserving fundamental capabilities that work when modern equipment fails.
Your survival preparedness journey is uniquely yours—shaped by your interests, activities, environments, and values. Don’t feel pressured to match someone else’s extensive gear collections or extreme preparedness levels. Build capability appropriate for your life and goals, whether that means basic day hiking preparedness or comprehensive wilderness self-sufficiency. Every improvement, no matter how small, increases your capability and confidence.
The ultimate goal isn’t just surviving hypothetical disasters but thriving in daily life with enhanced capability, confidence, and connection to fundamental skills. Whether you’re planning your first camping trip, building home emergency kits, developing everyday carry systems, or pursuing serious wilderness adventures, understanding quality survival tools and proper usage transforms you from passive consumer of modern convenience to capable individual prepared for whatever challenges life presents.
The survival tools and techniques we’ve explored—from essential knives through fire starting to comprehensive kit building—provide foundation for genuine preparedness and capability. Take this knowledge, apply it thoughtfully to your specific situations, practice regularly, and refine continuously based on experience. Your journey toward preparedness and capability starts now, with each small step building toward comprehensive competence that serves you across all of life’s adventures and challenges.
Remember that preparedness is both journey and destination—enjoy the process of learning, acquiring quality tools, practicing skills, and building capability. The satisfaction of self-reliance, the confidence of genuine competence, and the peace of mind from reasonable preparedness enrich your life regardless of whether you ever face serious survival situations. You’re now equipped with comprehensive knowledge to build effective survival systems—go forth prepared, capable, and confident.
Frequently Asked Questions
Q: What are the absolute essentials for a basic survival kit? The true essentials vary by environment but generally include: means to create fire (lighter plus backup ferro rod), water purification (filter and chemical backup), emergency shelter (space blanket or emergency bivy), cutting tool (quality fixed blade knife), first aid basics (bandages, pain relievers, personal medications), navigation (map and compass as GPS backup), illumination (flashlight with extra batteries), and signaling capability (whistle at minimum). These items fit in small pouches weighing just 1-2 pounds, yet provide fundamental survival capability across most scenarios.
Q: How much should I spend on survival equipment? Basic functional survival capability costs $150-300 assembling kit with budget-friendly quality items—decent knife, basic ferro rod, simple water filter, emergency shelter, minimal first aid. Serious outdoor enthusiasts might invest $500-1,000 for quality versions of everything plus redundancy. Diminishing returns appear quickly beyond that—$2,000+ gets marginal improvements unless pursuing specialized equipment for extreme conditions. Focus spending on critical items you absolutely depend on, economizing on less essential equipment. Skills matter more than gear—$300 equipment with proper training outperforms $3,000 of gear you barely understand.
Q: Can I rely entirely on primitive survival skills without modern equipment? Primitive skills provide remarkable capability with practice, but reality requires balancing romanticism with practicality. Building debris huts, creating friction fires, and living entirely off the land demands tremendous time, energy, and skill—exhausting you when survival requires conserving energy. Modern lightweight equipment amplifies capability dramatically while weighing just ounces. The ideal approach combines fundamental skills as backup with quality modern tools as primary methods. Learn primitive techniques appreciating our ancestors’ ingenuity while using modern advantages making survival far more achievable.
Q: How often should I replace or update survival kit contents? Inspect kits quarterly, checking batteries, food expiration, medication currency, and equipment condition. Replace batteries annually even if they test fine—reliability matters more than extracting maximum battery life. Rotate food and medications approaching expiration. Update kits when circumstances change—new family members, different activities, skill development enabling different equipment. Major kit overhauls every 2-3 years ensure continued relevance as your needs evolve. However, core items like quality knives, ferro rods, and shelters last indefinitely with proper care—don’t replace working equipment unnecessarily.
Q: What survival skills should I learn first? Priority depends on your environment and activities, but generally: fire starting in various conditions (wet, wind, cold), water sourcing and purification, basic shelter construction (both natural and with tarps), fundamental first aid including bleeding control and wound care, navigation using map and compass, and proper knife usage. These fundamental skills apply across most scenarios. Add environment-specific skills—snow shelter construction for winter mountaineering, desert water conservation for arid regions, etc. Hands-on training courses provide far better learning than books or videos alone—invest in quality instruction.
Q: Are expensive “tactical” survival tools better than cheaper alternatives? Not necessarily—marketing often targets those equating expense and tactical appearance with quality. Some premium tactical gear offers genuine advantages through superior materials and construction, but much “tactical” equipment is ordinary gear with aggressive styling and inflated prices. Evaluate based on actual specifications, user reviews, and company reputation rather than appearance or marketing. Conversely, cheapest options often fail quickly, making moderate mid-range equipment best value for most people. Reputable outdoor and bushcraft brands typically provide better survival equipment than tactical brands prioritizing appearance over function.
Q: How do I practice survival skills safely? Always practice in controlled environments with safety nets before depending on skills in real emergencies. Practice fire starting on designated fire pads in permitted areas with water and extinguishing equipment ready. Practice shelter building in backyards or established campsites near help. Never practice in conditions exceeding your ability—don’t practice cold weather survival during actual blizzards. Inform others of practice plans and locations. Carry normal safety equipment even during practice—practice primitive fire starting while carrying lighter as backup. Consider formal training courses providing expert supervision during skill development.
Q: What’s the difference between survival kits and bushcraft setups? Survival kits emphasize lightweight emergency equipment for unexpected situations—they prioritize being carried always, providing crucial capability when plans go wrong. Bushcraft setups emphasize traditional wilderness living skills using natural materials and specialized tools—they prioritize extended comfortable wilderness time over emergency preparedness. Survival focuses on getting out alive; bushcraft focuses on living well outdoors. Both have value—survival preparedness saves lives in emergencies, while bushcraft provides satisfying connection to traditional skills. Many enthusiasts appreciate both, using bushcraft during planned outings while maintaining survival readiness for unexpected problems.
Q: Can I build adequate survival kits with items from big box stores? Yes—major retailers stock functional survival equipment, though knowing what to choose matters. Avoid gimmicky “survival kits” containing cheap multi-tools and useless gadgets. Instead, select individual quality items—Mora knives, BIC lighters, basic first aid supplies, simple tarps, etc. These available mainstream items work fine for basic preparedness. Specialty outdoor retailers offer better selection of technical items like water filters or premium knives, but you can assemble functional basic kits from Walmart, Target, or hardware stores. Internet retailers provide best selection and prices for specialty equipment once you know specifically what you want.
Q: How do I know if my survival kit is adequate? Test it through realistic use—camp using only kit contents, discovering gaps or redundancies. Can you create fire in wet conditions using only items in your kit? Does your first aid supply address likely injuries? Do you actually know how to use everything you packed? Adequate kits match your environments, activities, and skill levels while providing genuine capability for realistic scenarios you might face. Kits should evolve through experience—what seemed important initially might prove unnecessary, while missing items become obvious through field use. Adequate isn’t about matching someone else’s list but rather meeting your actual needs reliably.
Articles related:

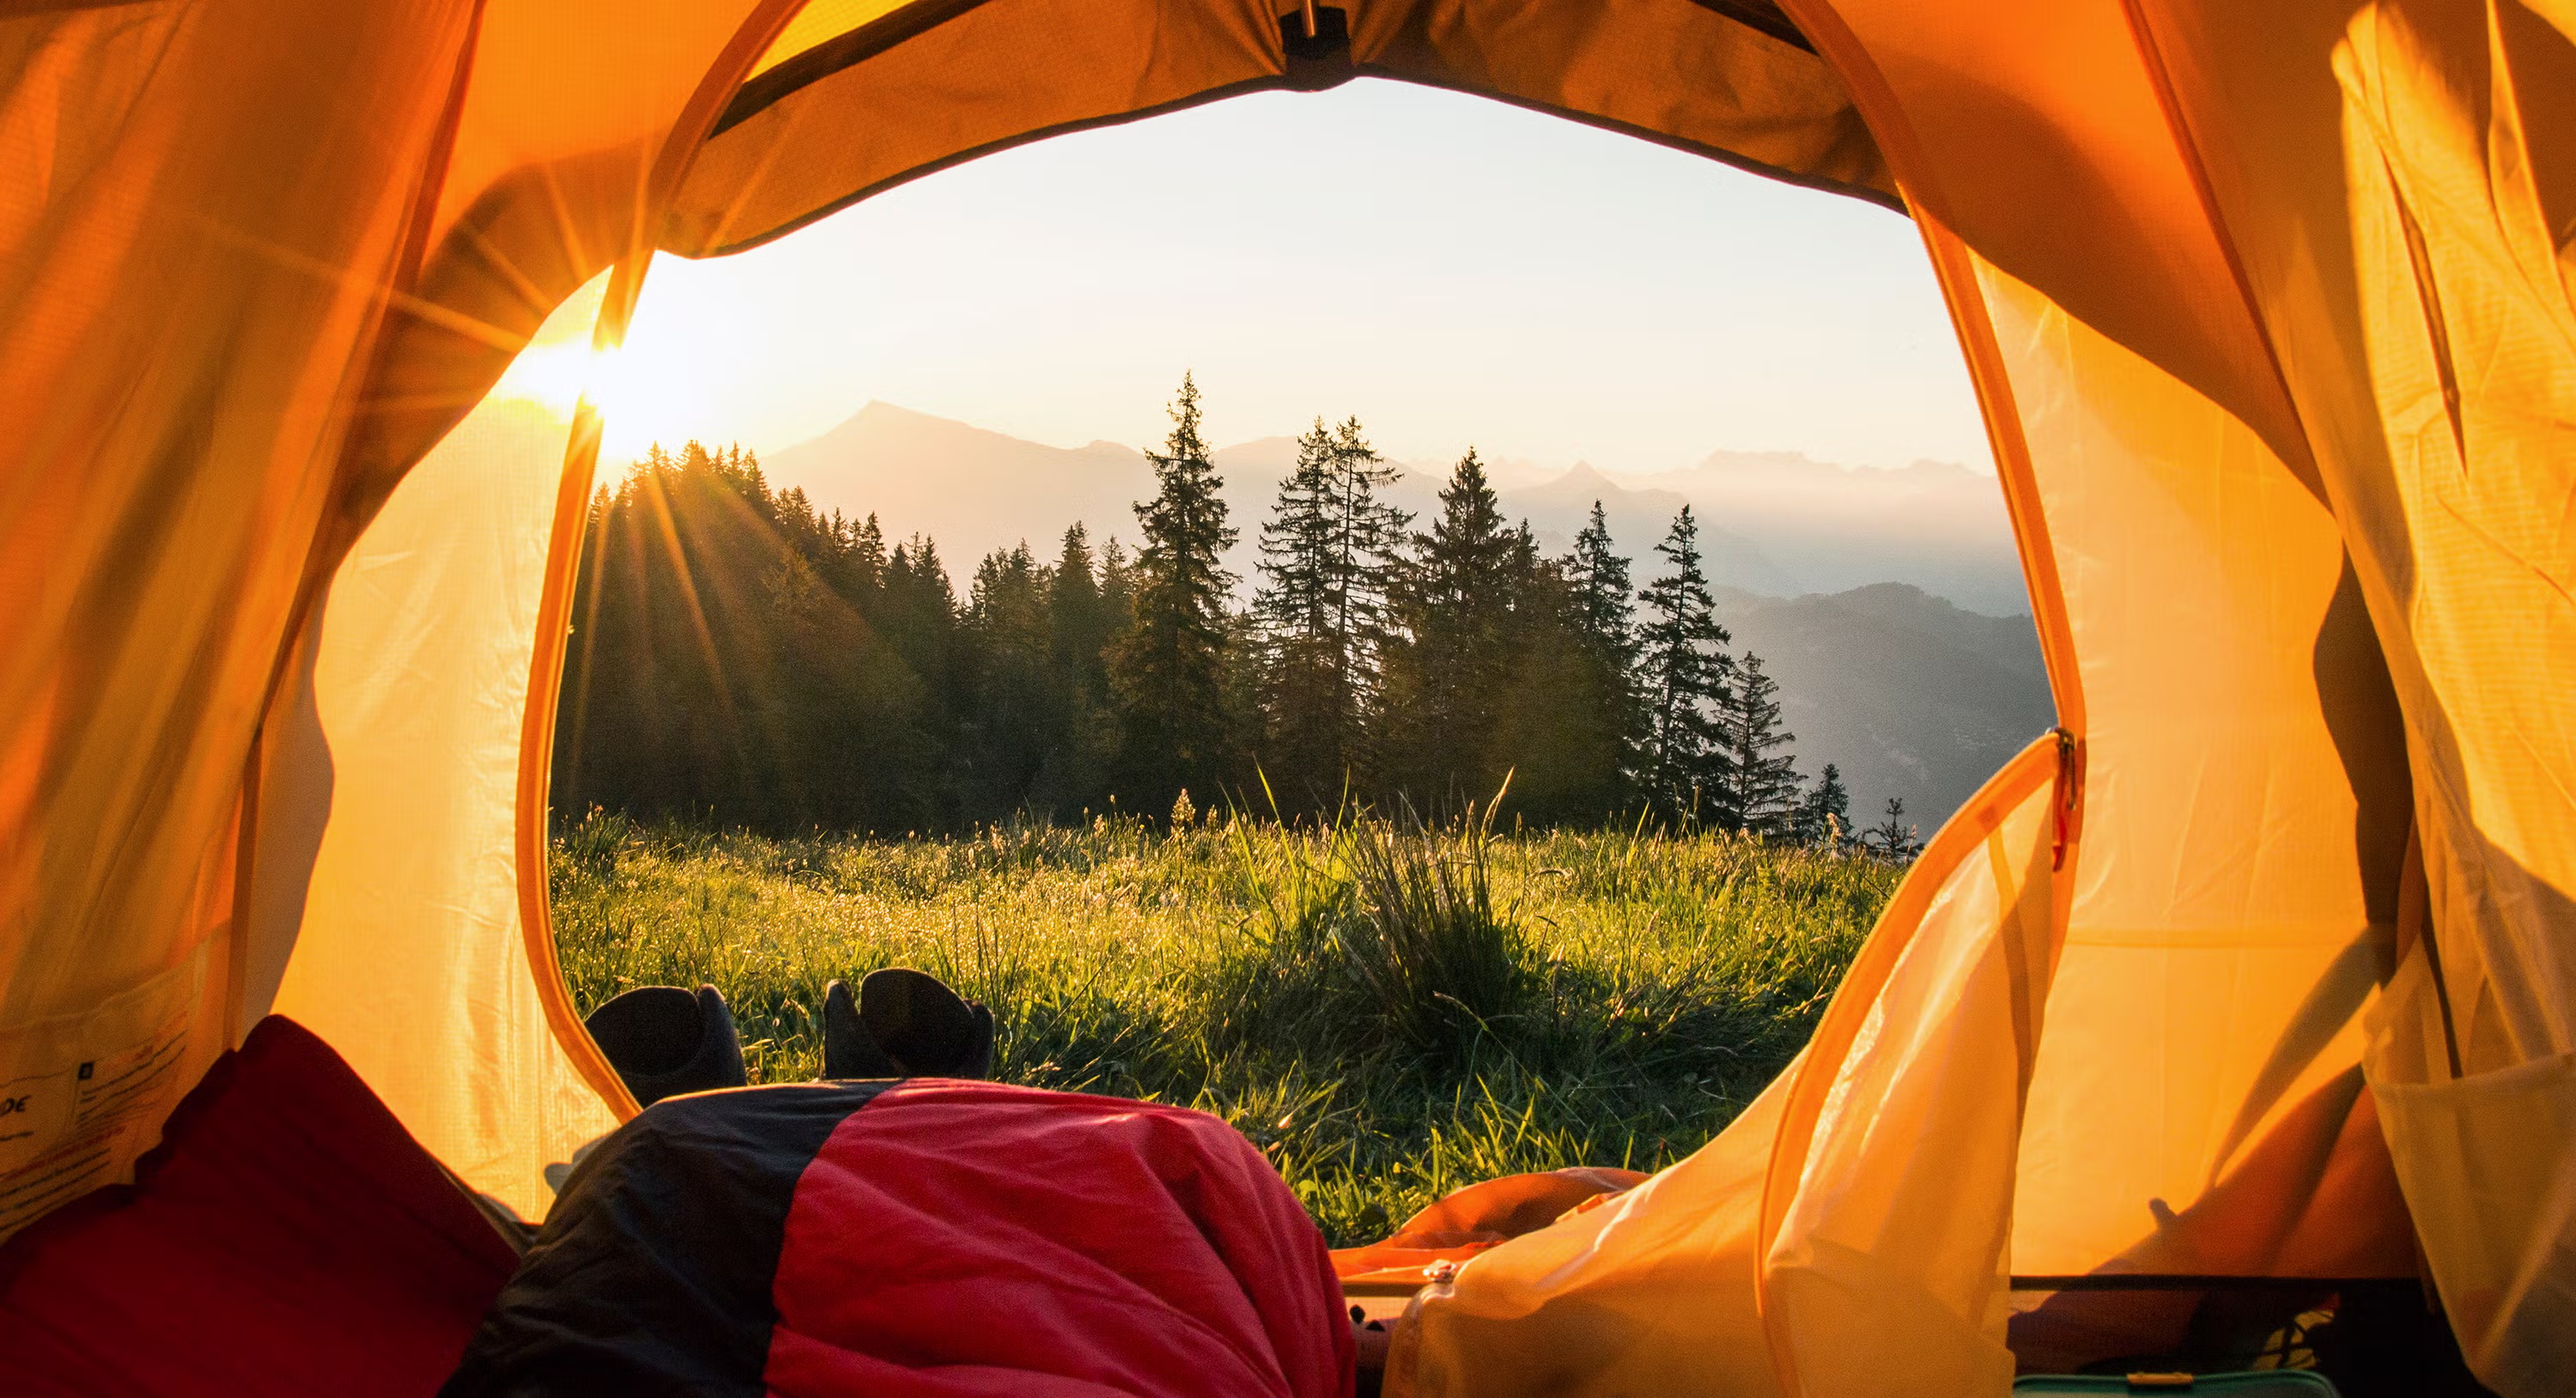
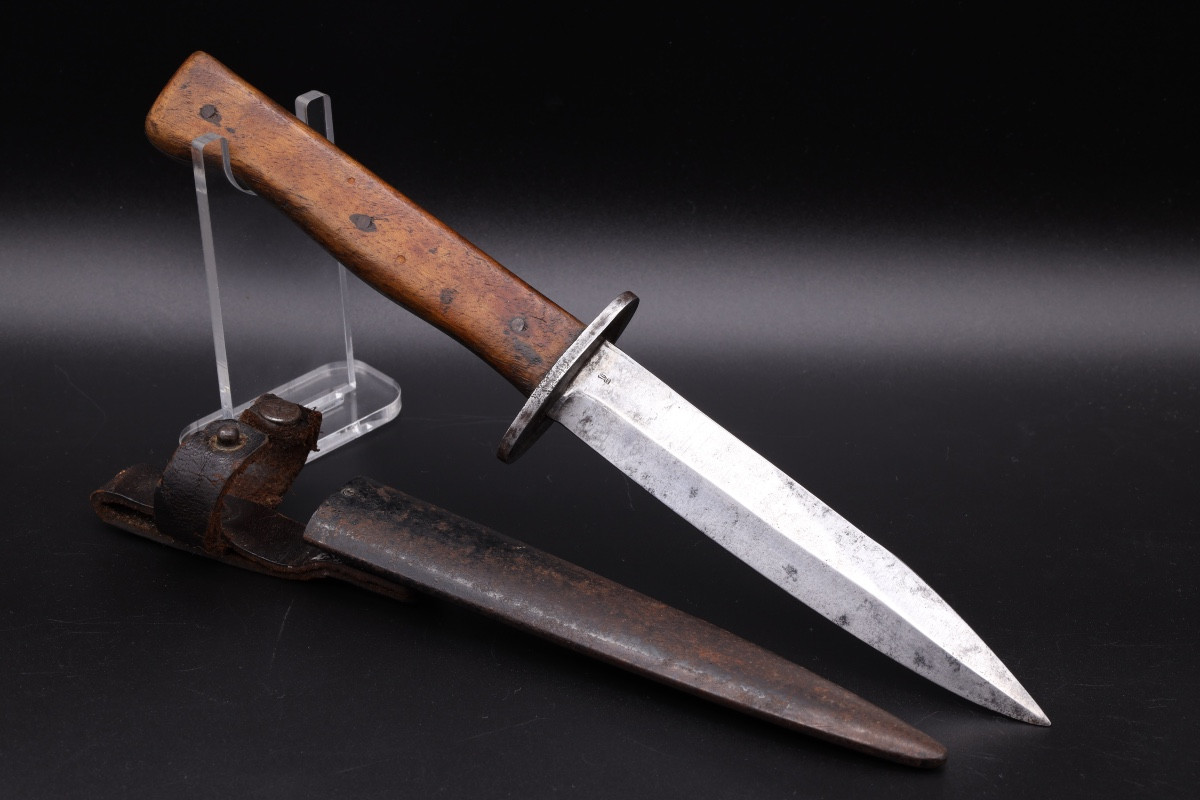
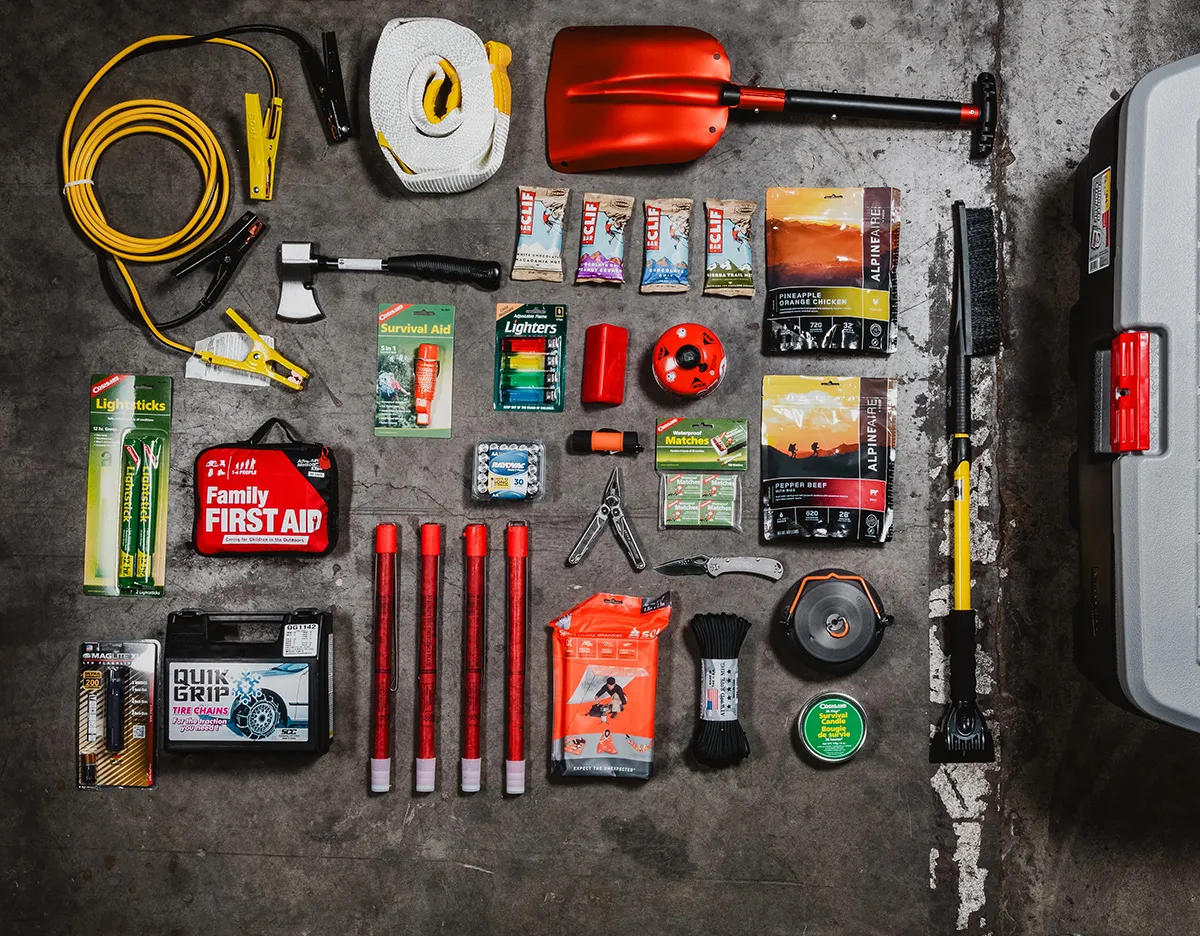

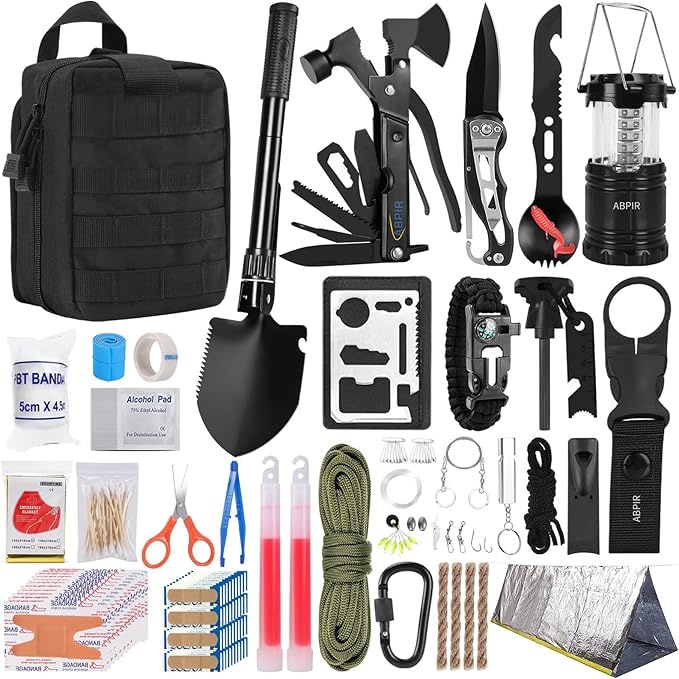
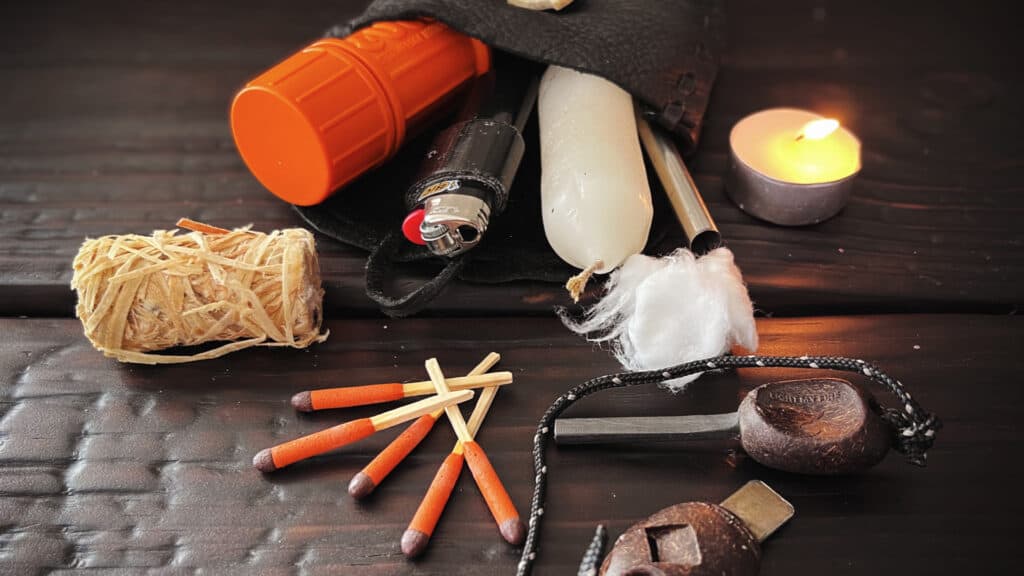
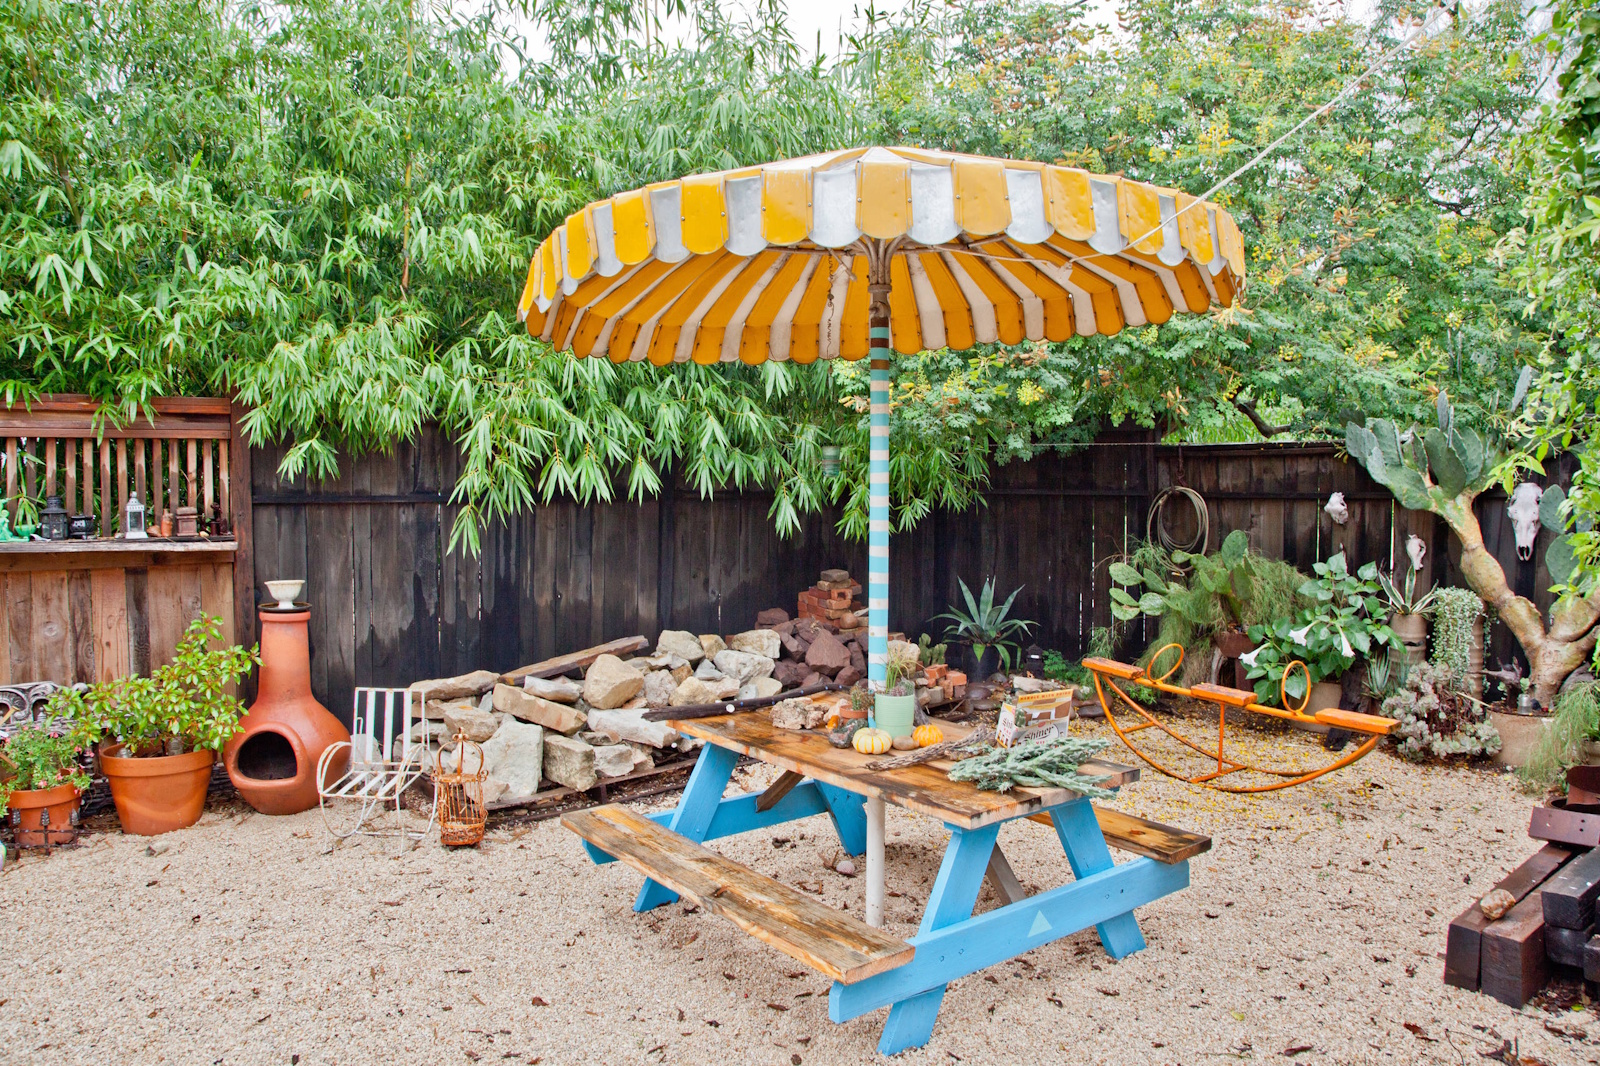
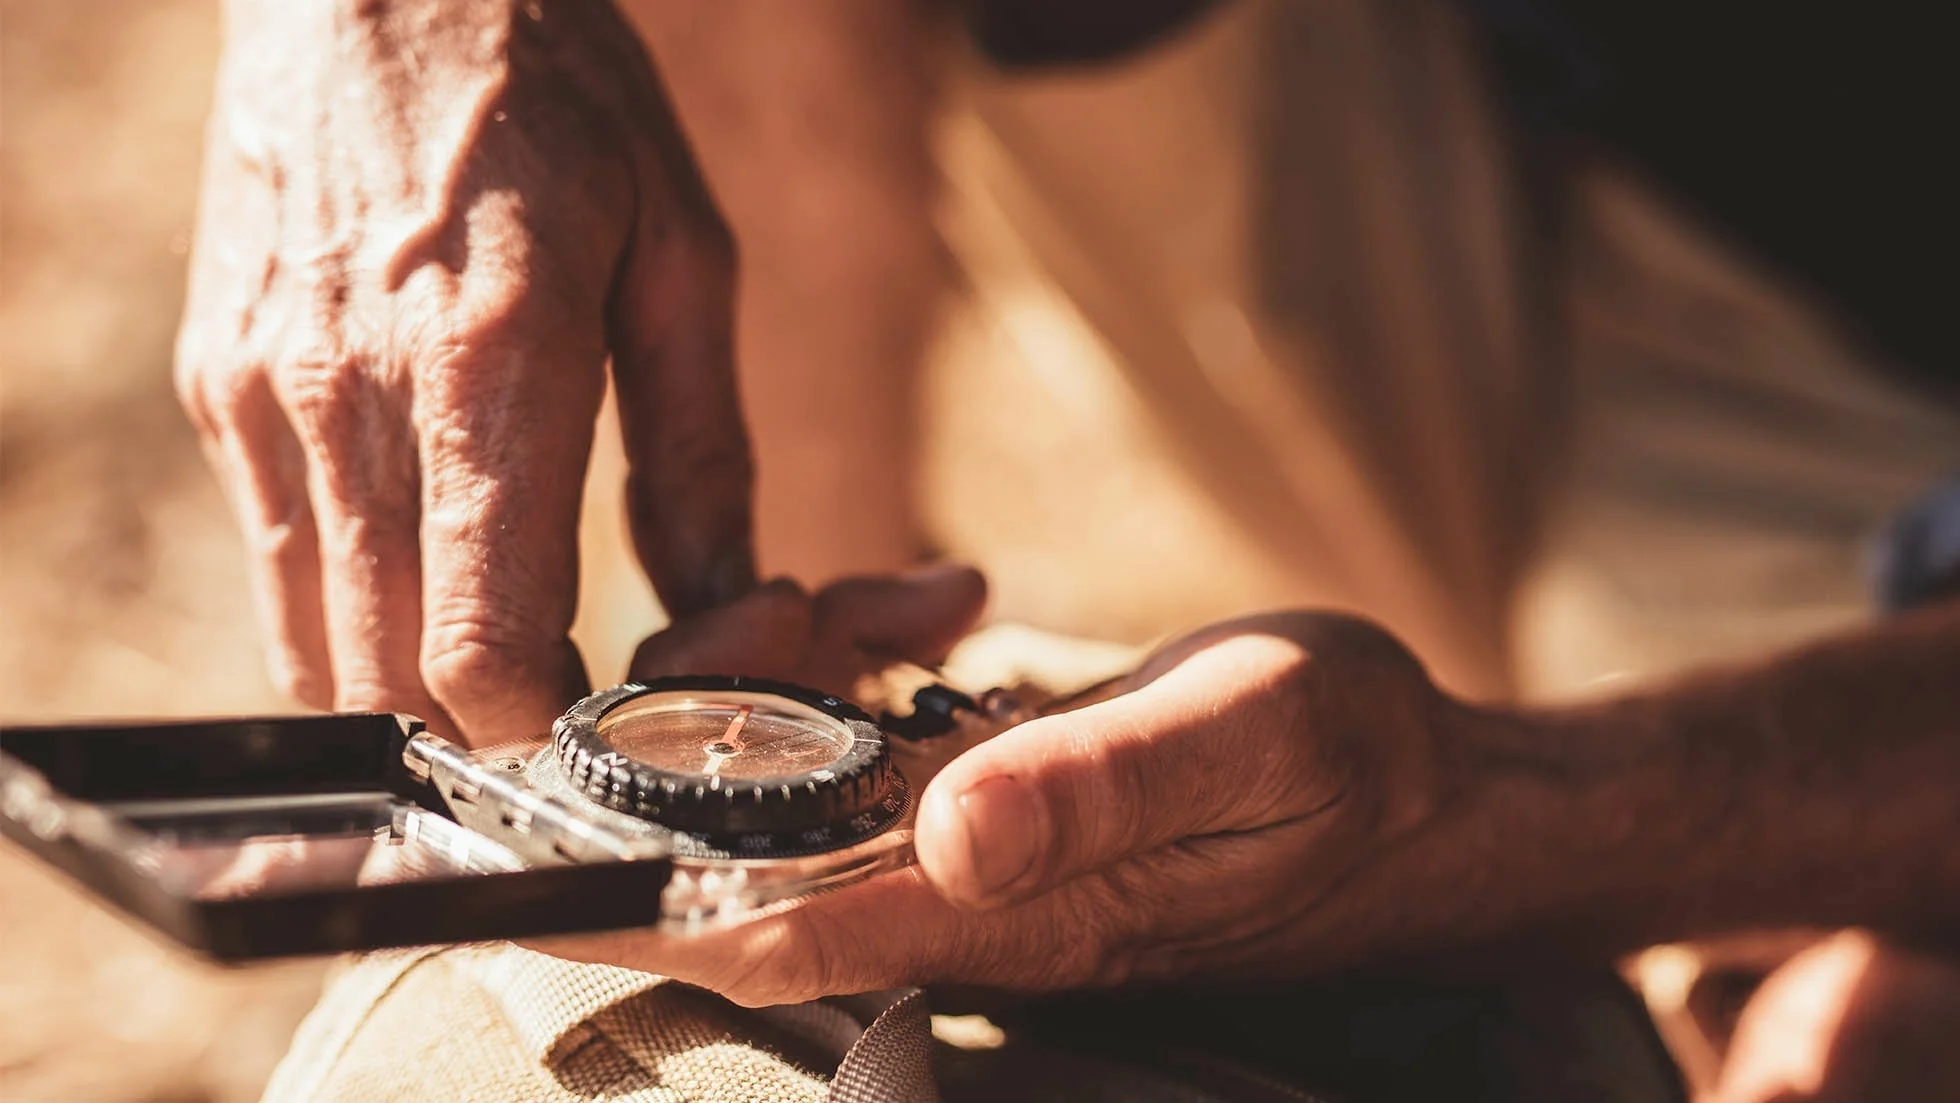
Tags
📧 Get More Articles Like This
Subscribe to receive product reviews and buying guides in your inbox!
We respect your privacy. Unsubscribe at any time.